Strawberry Fields Forever

When I was a student, I lived in Liverpool, England. Decades after their break-up, the Beatles’ presence could still be felt everywhere. I even spent a year with my bedroom window overlooking Penny Lane. My Brother moved there two years before me and once gave me a tour around all the famous Beatles locations, including "Strawberry Fields."

This season, where strawberries are king, always throws me back to those days.

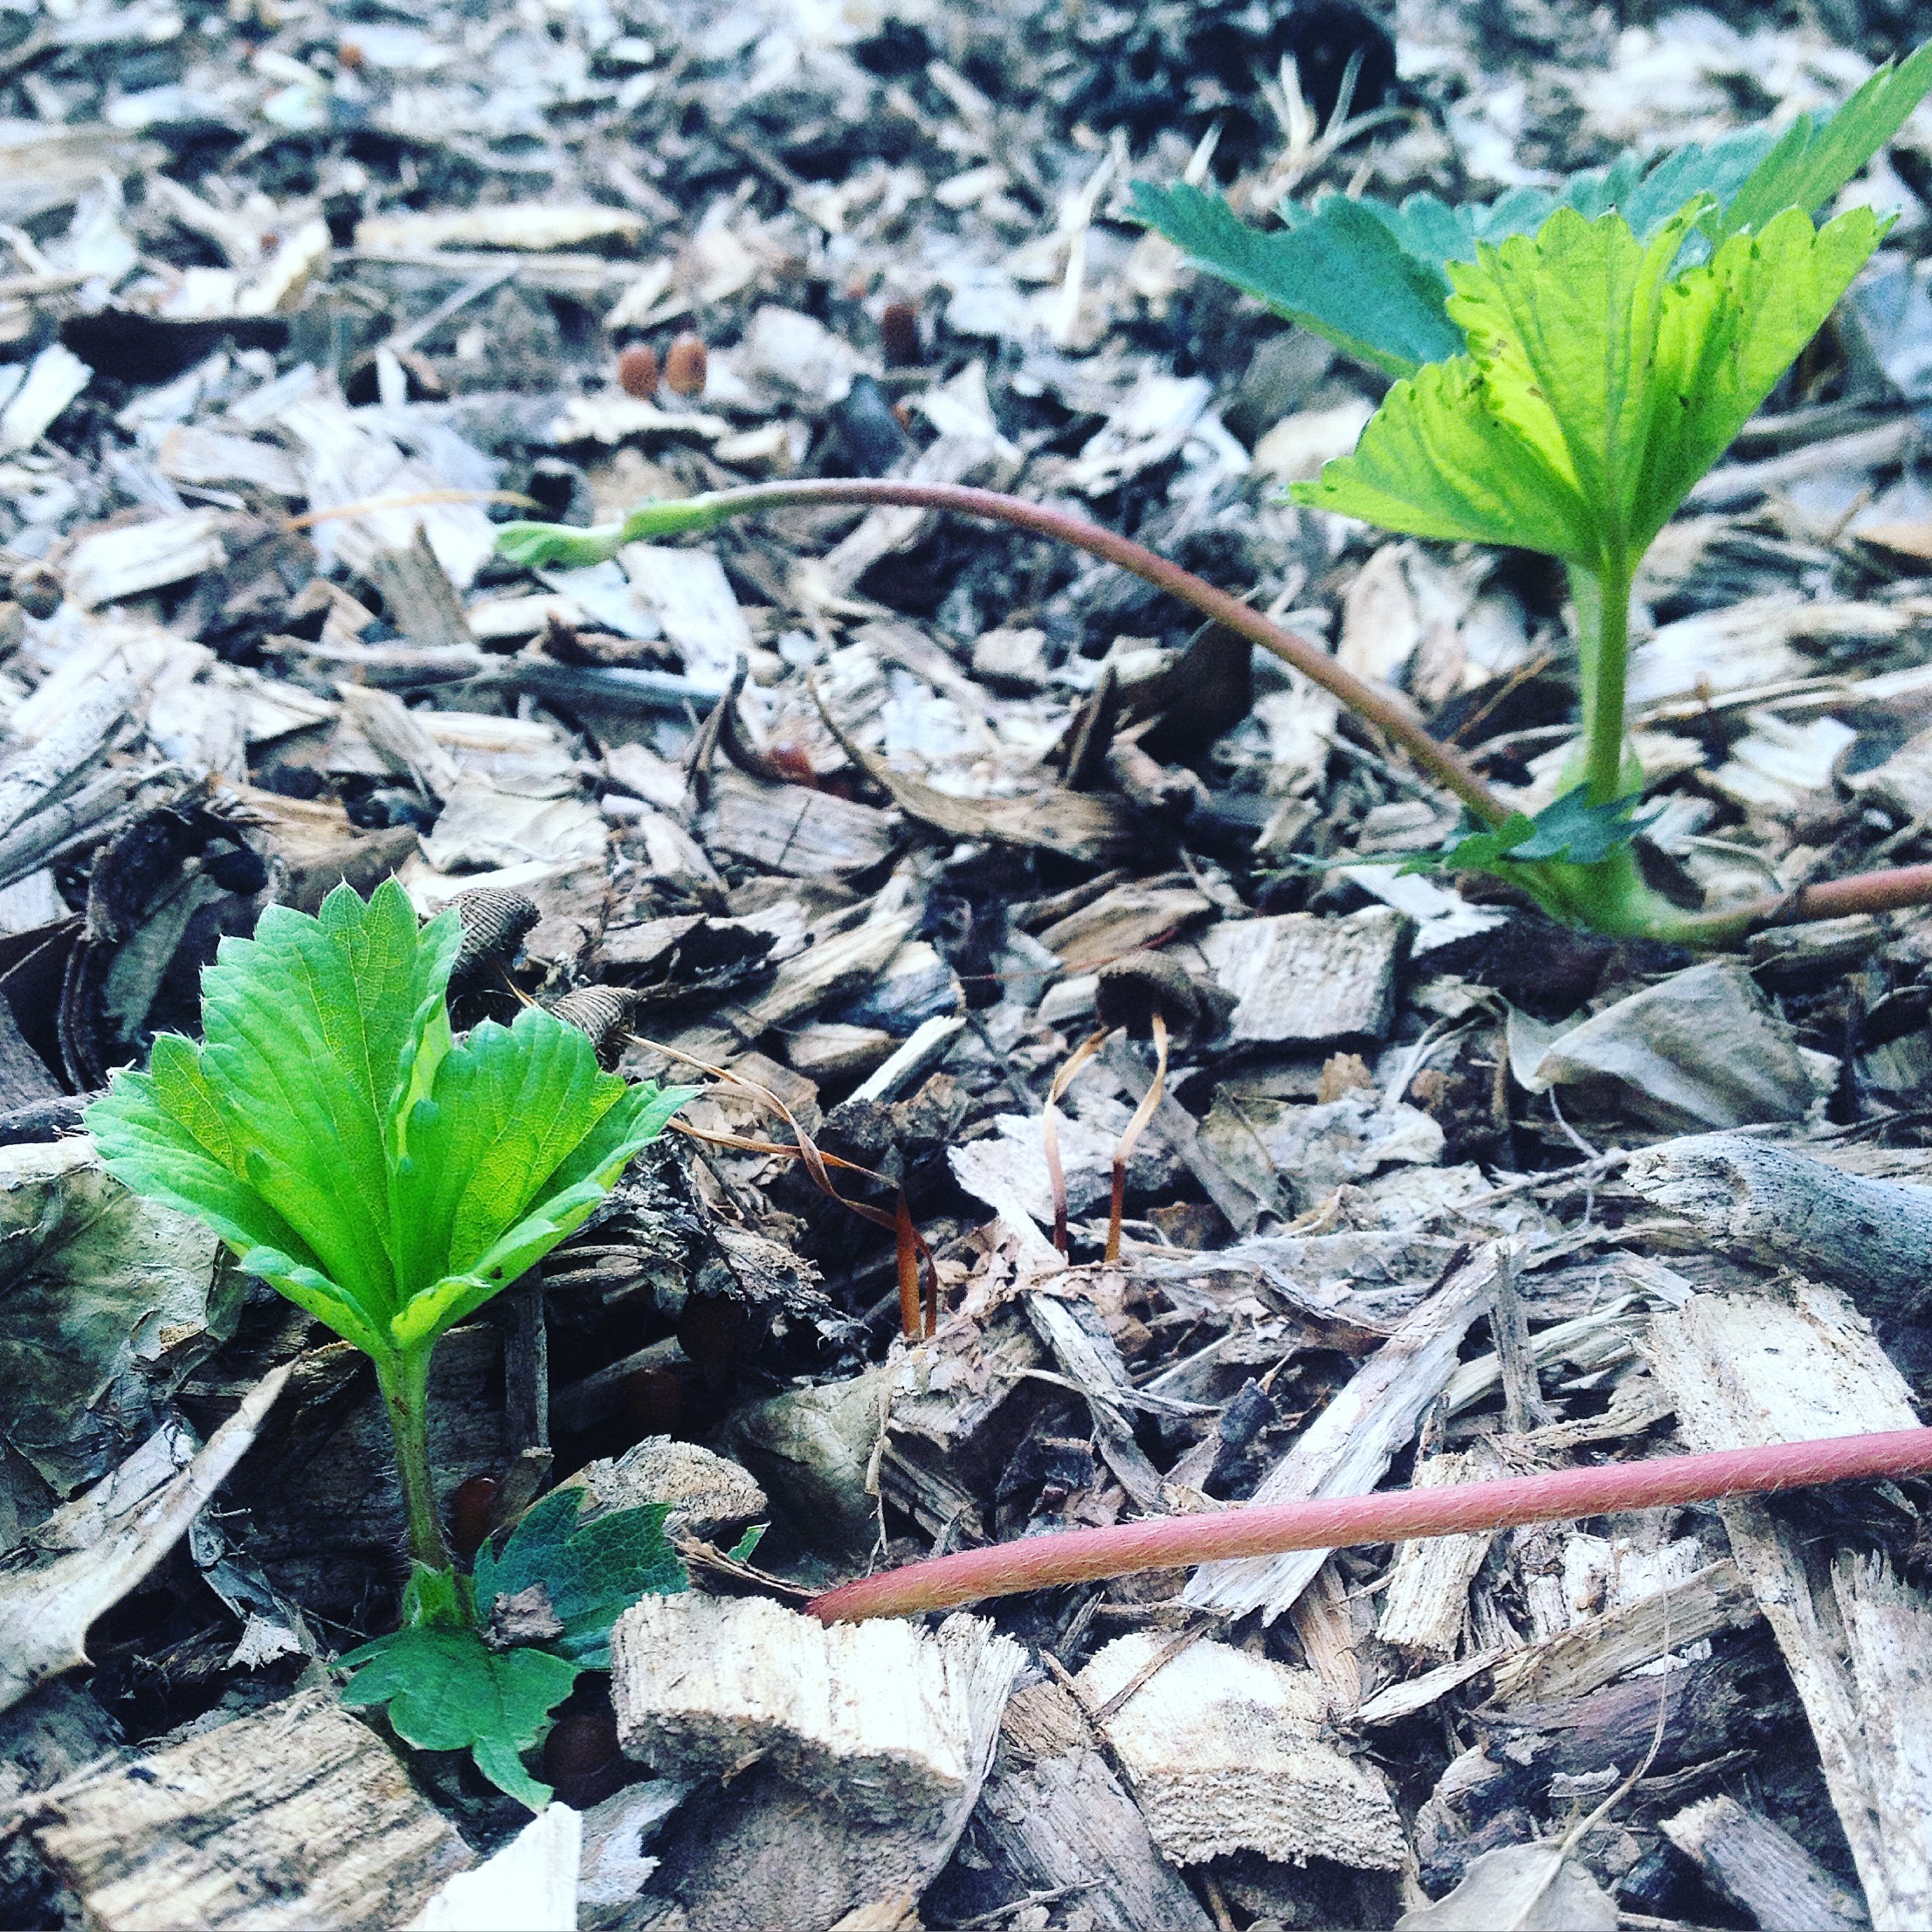
Strawberries are one of the easiest foods to grow in your garden and, if you haven’t already got a patch, I hope this post will get you thinking about starting one. Although the fruiting season is now, there is still plenty of time to get plants in the ground which will fruit next year. I planted my first patch in August after a friend gave me some runners — the shoots the parent plant puts out.
Here are a few strawberry basics:

1. There are two basic varieties of strawberry: one which will give you all it’s fruit over about three weeks (great for jam making), and one called an ever-bearer, which will give smaller amounts of fruit for longer (better if you want them to eat straight from the garden in smaller quantities). I have patches of both.

2. A strawberry plant will last about four years. Years two and three will give you the most fruit, so it’s a good idea to try to keep plants of the same age together so you know when to replace the old with new. Since they produce a lot of runners, you’ll be able to keep making new rows with enough to give away to friends for them to start their own beds.

3. When the fruits are beginning to turn red, cover your patch with bird netting; otherwise, you’ll regret it! And, if you are still seeing little holes in your berries, it’s probably slugs, so leave some beer traps out overnight.

Even if you don’t grow your own, or don’t have enough from your garden, it’s a great time to support a local grower and have a go at making your own jam. I made my first batch last year and I don’t mind telling you that I thought it would be a lot more work than it actually was, especially since I was preserving in jars, as opposed to keeping it in the freezer. But, after a few more tweaks to the recipe this year, I am so happy with this jam that I have no intention of ever changing it. Making strawberry jam has now officially been crossed off my gardening learn-how-to-do list. And even better — there is no refined sugar in it — only honey.

STRAWBERRY JAM WITH HONEY

INGREDIENTS

For approximately every 8 oz jar of jam you will use:
1 generous cup chopped strawberries
1 Tbsp pectin (I used Ball Real Fruit Classic Pectin)
1/4 cup honey
1/3 Tbsp lemon juice

You will also need 8 oz mason jars and it’s a good idea to buy a jam canning utensil kit so you don’t burn yourself. Ball makes a great one for under $10 (which is sold at Target, Walmart, Amazon, and Bed, Bath & Beyond). If you grow your own strawberries, each jar will cost a total of about $1.17 to make.

DIRECTIONS

1. In a large bowl, mash up the strawberries with a potato masher. A couple of minutes mashing should do it. You don’t want to lose too much texture. I make eight jars at a time, so I’m working with 8 cups.

2. Add 1 Tbsp of pectin per cup of strawberries and mix in.

3. In a large pan or pot, bring the berries and pectin to a boil — boil for about a minute, stirring occasionally.

4. Take the pan off the heat. Add the honey and lemon juice. Mix well.

5. Put back on the heat and boil for about 10 minutes, again, stirring occasionally. You’ll see foam starting to form around the edge of your pan. Try to skim off as much of that as you can.

6. After the jam has boiled, take it off the heat and leave to cool for about 10 minutes, stirring occasionally to aid the cooling process. Now it’s ready to be ladled into your jars.

Just an extra note here: I made my first batch without leaving it to cool slightly before canning and the fruit rose to the top. As the finished jars were cooling, I shook them occasionally to help it all to settle, but cooling for a few minutes first seemed to help.

PREPARING THE JARS

Submerge your jars and lids in boiling water and leave them to boil for 10 minutes. I use an old stock pot for this which will take eight jars at a time. Lift them out onto a towel until you are ready to fill them with your jam. They should air dry very quickly, but try not to let the jars cool completely before filling. They may crack when you plunge them back into the boiling water.

Once the jam is in, wipe away any mess around the top of the jars with a paper towel and put the lids on. Then, put them back into the pot and boil for another 10 mins. Lift them out again and place them back on the towel to cool completely.

You now have jam that will keep until next strawberry season! And, once you’ve tasted your home-made version, anything from the store is not going to come close.
Sheep’s Pie (with Prince’s Purple Rice)

Prince Rogers Nelson was taken from us far too soon, on April 21, 2016. I have to imagine that he's still out there somewhere … not finished raining his magic down upon us.

In honor of His Purple Princeness — gah, I adore him so much! — this month's recipe features a dish that I would like to believe that Prince would've enjoyed. If you don't already know, Prince was a most-devout vegetarian. (Listen to his song "Animal Kingdom" to hear what I'm talking about.) In 2006, PETA crowned him their Sexiest Vegetarian Celebrity. (I think that they should've let him keep the crown in perpetuity.)

I set out to create a dish in Prince's honor that sang of comfort. I've been in a comfort food mood lately, myself, even before we got the news on April 21 — and that only made my cravings that much stronger. However, you should know that I'm the girl who chooses comfort foods that leave me feeling better — not worse. I'm not your frozen pizza or French fries friend. I'm not a hater; I'm just a regulator. I'll have some fries, but I just won't let it get out of hand because I know how my body works best. When I'm feeling down, I need to eat foods that help pick me back up.

Let's talk for a minute about a well-known comfort food that's covered in creamy, buttery mashed potatoes, browned and crisped to perfection in the oven. Underneath all of that pillowy goodness there's usually a combo of meat, vegetables, or both. If your mouth is watering even slightly at this moment like mine is, you're probably picking up what I'm putting down: shepherd's frickin' pie.

Today we are going to flip the script on this traditional offering and even change its name!

With that, I'd like to introduce you to Sheep's Pie … because shepherds eat sheep, and sheep eat grass and grain (the latter being generally reserved for the mothers-to-be who need more fortifying nutrients, so I'm told). Don't worry: There ain't no grass up in this dish; it's just a play on a theme. We'll have leeks, mushrooms, carrots, warm exotic spices, and more topped with fluffy jasmine rice instead of mashed potatoes for an added twist! In honor of Prince, I made my rice purple, which is rather easy to do. You might not want to go there with me but, if you do, instructions* will be below.

Enjoy!

INGREDIENTS
Ample kosher or sea salt (multiple specifications below)
*1/2 head of red cabbage, cut roughly into 3" inch pieces
1 1/2 cups water
1 cup jasmine rice
2 tsp salt
3 Tbsp coconut oil
1 pound large crimini, button, or portobello mushrooms — quartered
1 tsp salt
1 tsp black pepper
2 carrots, diced
2 stalks celery, diced
1 large leek, split lengthwise, washed, chopped into 1/2 inch slices
1 inch ginger, peeled and minced
1 tsp salt
6 garlic cloves, course chopped
2 Tbsp unbleached all purpose or GF flour
1 Tbsp curry powder
2 Tbsp ground coriander
1 Tbsp chili powder
1 can coconut cream (split into 2/3 and 1/3 portions)
4 cups of water, mushroom, or vegetable stock
2 Tbsp red wine vinegar
salt to taste
1 pound russet potatoes, washed and cubed into 1" pieces
2 medium to large vine tomatoes, diced and salted
1/2 cup flat leaf parsley, chopped
1 cup frozen (thawed) peas

DIRECTIONS
Place 1.5 cups of water in a small pot. *Add cut cabbage and bring to a boil, then cover and simmer gently for 15-20 minutes. Remove cabbage and strain purple water to remove any loose cabbage and return to pot. Add 2 tsp salt and 1 cup of rice, bring to a boil, stir well then cover and turn down to simmer for 15 minutes. Remove pot from the stove and let sit, covered.

Place 2 Tbsp coconut oil in a large pot (dutch oven is even better). Turn heat to high. Once oil melts, immediately add all mushrooms and distribute evenly in the base of the pot. Do NOT touch them for 60 seconds. After this, toss immediately, and lower your heat to medium-high and sprinkle 1 tsp salt and 1 tsp pepper over mushrooms and toss. Do NOT touch them for another 60 seconds. Toss one final time, remove mushrooms from pot, and set aside. I like the mushrooms to retain some of their meatiness so I do not overcook them.

Place 1 Tbsp coconut oil into same pot still on medium-high heat. Once it melts, add the carrots, celery, leeks, and ginger. Sprinkle 1/2 tsp salt over top and stir frequently until carrots and celery are al denté (10-12 minutes). Add garlic and stir frequently for 2 minutes. Check for salt and add 1/2 tsp more, if needed. Turn down to low and cover.

In a small bowl or cup, combine flour, curry powder, coriander, and chili powder — mix well. Sprinkle mixture over vegetables in pot and turn heat to medium, stirring for 5 minutes to coat the veggies and heat the flour and spices.

Add 2/3 can of coconut cream, 4 cups water or stock, 2 Tbsp red wine vinegar — stir well. Check for seasoning and add salt to taste. Add potatoes and cover pot. Let cook on medium to medium-high for 15 minutes or until potatoes are tender. Uncover pot and add tomatoes. Let cook for 5-10 minutes. If it's too soupy, turn the flame up a bit and cook a little longer to reduce some of the liquid. Once it's thick and rich, add back in the reserved mushrooms and parsley, and stir. Turn off heat and cover.

In a food processor, combine thawed peas, final third of coconut cream, and a pinch of salt — pulse until spreadable.

Ladle the potato mixture evenly into a deep round, square, or rectangular baking dish, leaving 2 inches of open space on the top. Then, scoop out mashed peas on top of that and spread evenly into a thin layer. Scoop rice on top of that and spread out with a spatula and a firm touch. Feel free to press rice into place, if needed.

Place into oven on a low broil for 3-5 minutes. Watch it very carefully! You're going for a lightly toasted flavour, not colour. Crunchy rice can mess up your dental work!

I hope that you will try this dish at home and feel the comfort that I felt when cooking and eating (lots of) it. Eat it whilst listening to "Purple Rain." Eat it whilst listening to "7." Eat it whilst listening to "Raspberry Beret." Eat it whilst listening to "Diamonds and Pearls." You catch my drift. Have second and third helpings.

P.S. — This dish would also go nicely with some pesto broccolini on the side. I heard that was one of his favorites, too.

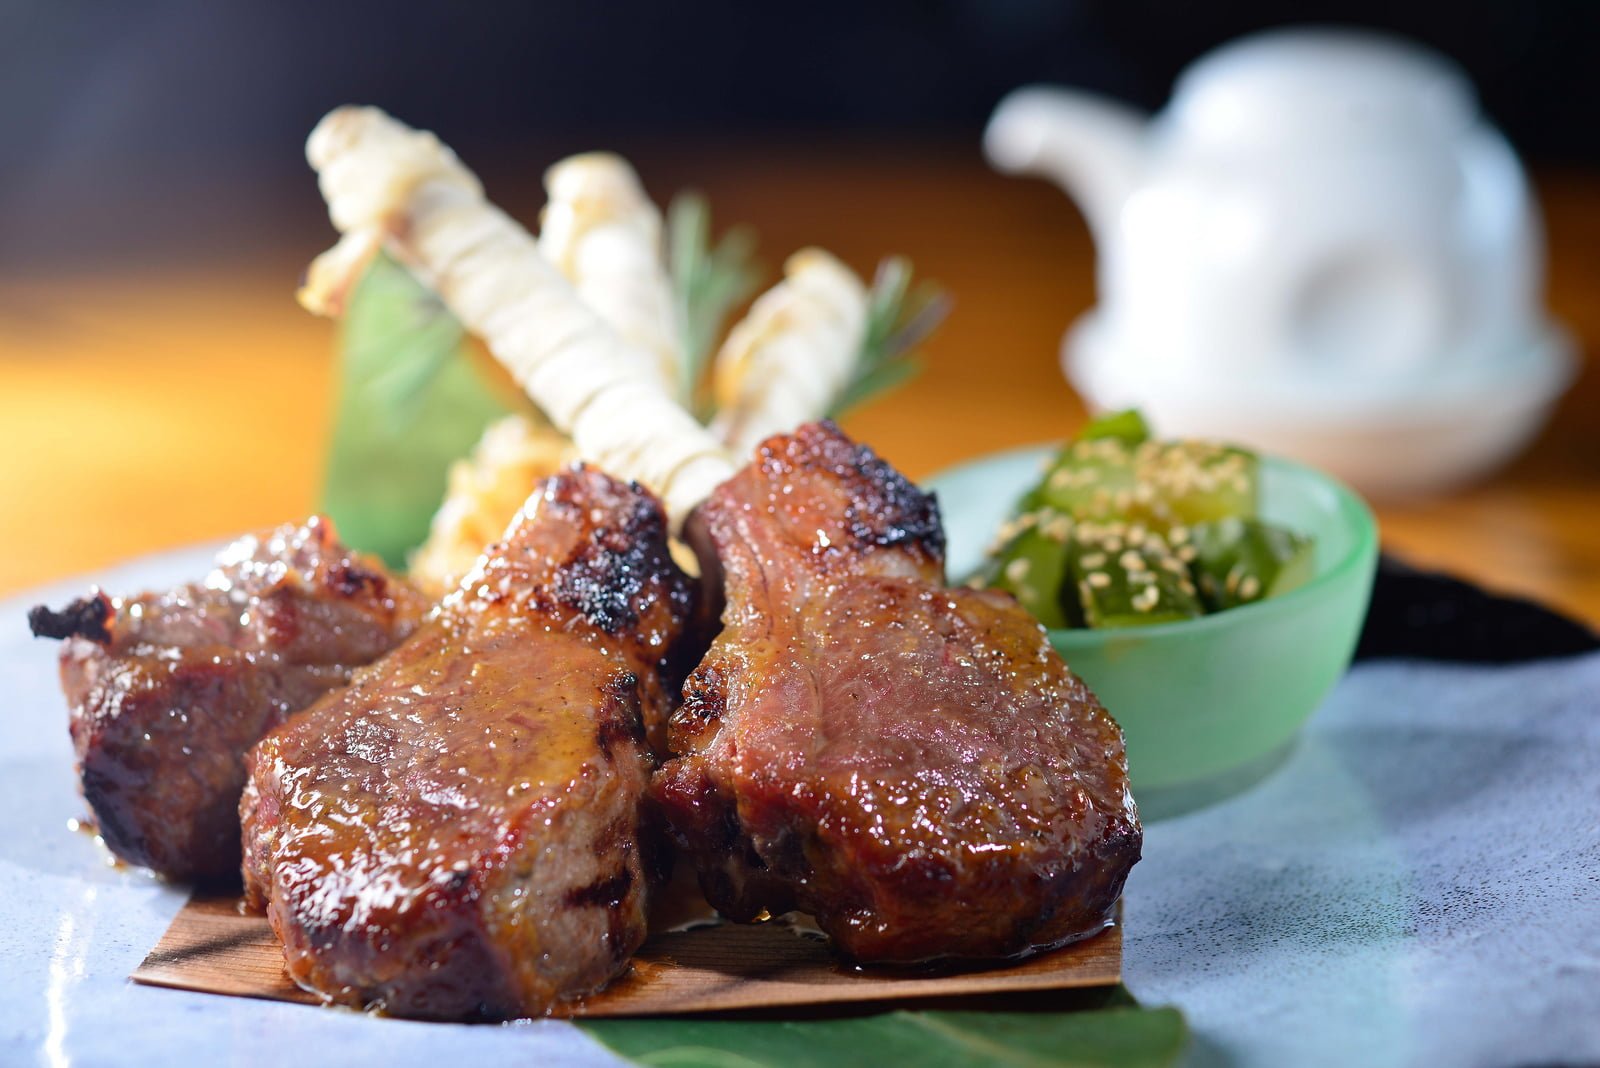
Grilled Rosemary and Garlic Lamb Chops

The flowers are blooming, the bees are buzzing, and grilling season is here again. One of my favorite meats to grill for a dinner party is lamb chops. They cook fast, taste great, and please dinner guests beyond expectations.

I was shown this recipe 25 years ago when I was in chef school, and it remains my favorite. The marinade is simple, but perfect. If you serve these at a dinner party, plan for about five chops per person. They’ll start with three, reach for another one, and then almost always politely check to see if there might be one more available. People eat more of these little chops than they think they will, because they are so delicious.

Frenching a rack of lamb — that is, removing the fat and membranes which extend to the end of the individual rib bones — gives the rack a clean look for an elegant meal. Elegance aside, you can hold the rib bone and eat the chop like fried chicken without any worry of offending anyone. In fact, it’s nearly impossible not to. They are so tasty, you’ll want to grab every last bite. You can buy them Trader Joe’s, already Frenched.

The perfect lamb chop grilling album? Gillian Welch's Time (The Revelator).

INGREDIENTS
1 package of Frenched New Zealand Lamb Chops (about 10 chops)
10 pods of fresh garlic, chopped fine
5 sprigs of fresh rosemary, chopped roughly
6 tbsp Olive oil
3 tbsp fresh lemon juice
Tony’s Creole seasoning

DIRECTIONS
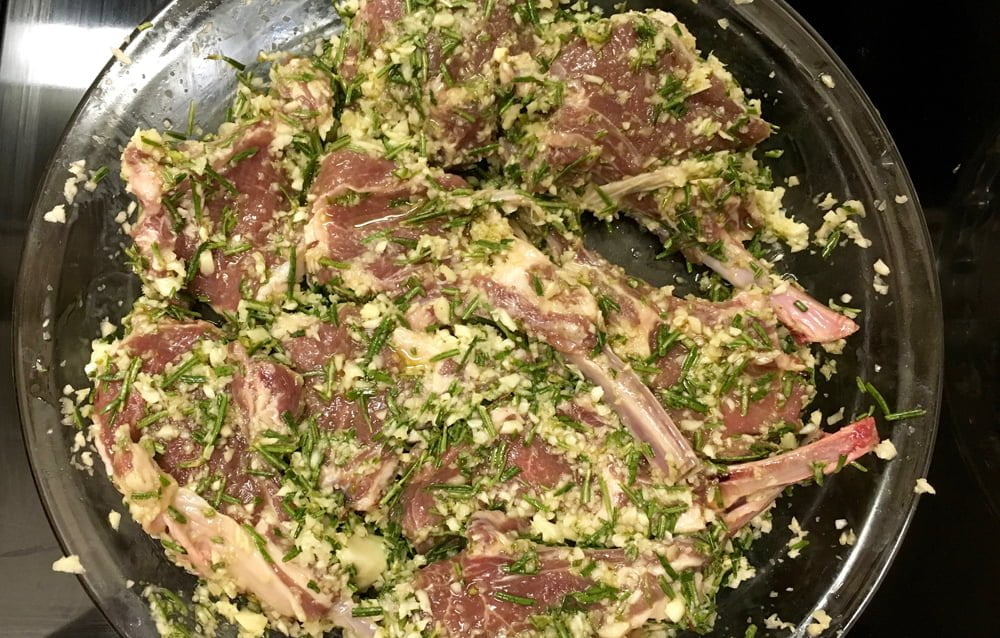
Use a very sharp knife to slice the lamb into individual chops. Set to the side. Combine the chopped garlic, rosemary, lemon juice, and olive oil in a bowl, toss the chops in, and coat them. Then lay them in a single layer in a flat glass container and cover them with the marinade from the bowl. Refrigerate for at least 24 hours.

Remove from the refrigerator two hours before you plan to grill them, bringing them to room temperature. This helps the garlic and rosemary to sink into the meat.

Heat the grill up on high, and then wipe the grill down with a paper towel thickly coated in olive oil. This cleans it, and helps the chops not to stick. Turn it down and prepare to barbecue on medium-high heat.

Place the marinated chops on the grill. They cook very quickly — about 3-4 minutes per side for medium-rare.

Serve with warm garlic bread and a huge salad.


Lede photo credit: InterContinental Hong Kong via Foter.com / CC BY-ND.

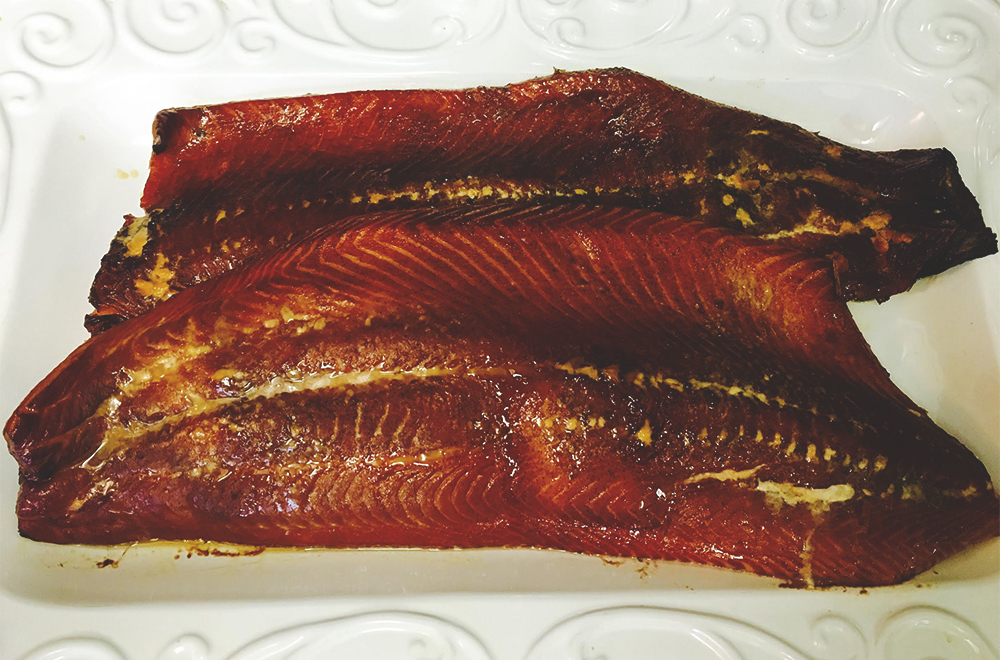
The Best Smoked Salmon on Planet Earth

Smoking your own side of salmon is easy. It does not require much work and is a wonderful option, if you’re cooking for a few people. The last time I cooked one it was snowing… it was a wonderful afternoon!

I guarantee that this recipe will impress your guests, if you choose to use this as the centerpiece of a dinner party meal. I have done exactly that over the years, and my guests always leave raving about it. When I see them again out there in the world somewhere, it’s almost always the first thing they bring up when they see me: “Oh my God, that salmon … how the hell you do that? I can’t stop thinking about it!” It makes me smile. I love making memorable food, and this one is a no-brainer. The secret is to brine it overnight in two kinds of sugar and salt, then let it sit out on a tray the next day for a few hours and form a thin skin before you smoke it. The rest takes care of itself.

To me, store-bought smoked salmon just ain’t right. It’s wrapped in plastic, too expensive, and it’s always either dry or oily. This simple recipe will disabuse you of ever buying that stuff again!

INGREDIENTS
1 whole side of fresh salmon
1 cup of white sugar
1 cup of brown sugar
½ cup of salt
Tony’s Creole Seasoning
1 cup Mesquite Chips
1 cup Hickory Chips
Pam Non-Stick Olive Oil Spray
Charcoal
A Weber grill

DIRECTIONS
Take a whole side of fresh salmon and put it in container big enough to lay it down flat in, then pour the white sugar, brown sugar, and salt on top. Fill the container with water, and make sure the water covers the salmon. Stir it up a bit, cover it, and put it in the refrigerator overnight.

Take it out the next day a few hours before you’re going to smoke it, shake it off, sprinkle Tony’s Creole Seasoning on it (be careful, a little bit goes a long way!), and lay it flat on a big plate or a board. Toss the soaking sugar water, and let the salmon dry in the air for at least three hours.

When you’re ready to smoke it, pour coals on one side of the grill, light them, and wait until they glow. While waiting, take the mesquite and hickory chips, and soak them in water.

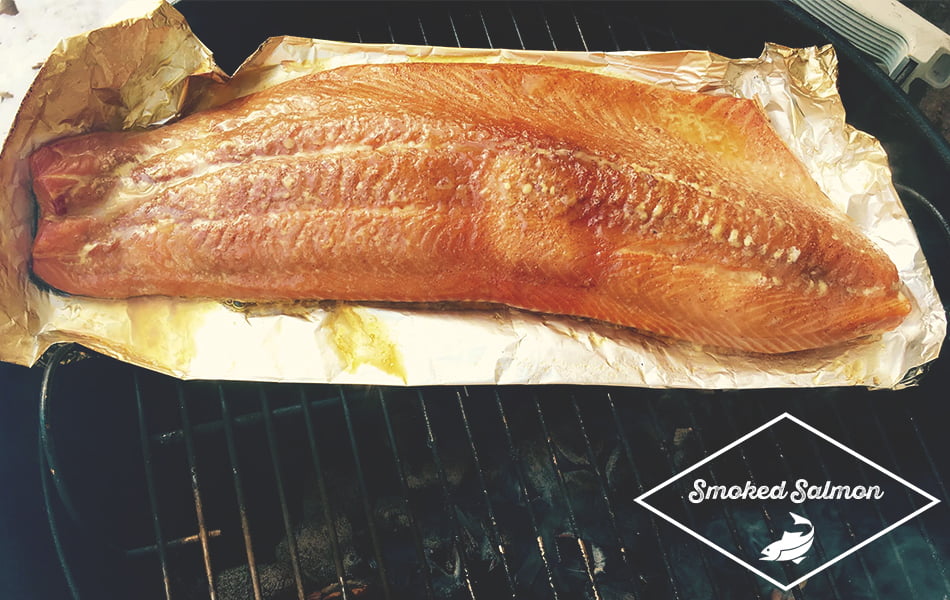
Tear off a big piece of aluminum foil and fold it so that it’s thick enough to hold the side of salmon. Spray it with Pam Non-Stick Olive Oil Spray and put the fish on the foil. Pour the soaked, drained hickory and mesquite chips on top of the coals, and let them get going good. Then place the fish and the foil on the grill, on opposite side of the coals. The idea is to SMOKE the fish, not barbecue it. Cover the grill tightly with the lid. The smoke will turn the fish a beautiful brown and, after a few minutes, you’ll need to slightly open a vent to let some air into the grill to keep the fire burning. The trick is to let enough air in to keep the smoke coming, but not too much, because you don’t want flames leaping up and burning the bottom of the fish. Again, the idea is to smoke the salmon, so keep it off the coals as best you can.

The salmon is cooked when you touch it and the flesh has tightened. You’ll know you’re there when the white liquid stops forming on top. It usually takes about 30-40 minutes. Don’t overcook it! It will continue to cook a bit after you take it off, so I always err on the side of caution.

Enjoy!


Mary Gauthier was a chef long before she ever wrote her first song. Her latest album, Trouble & Love, came out in 2014.

Bluegrass Cocktails: Uncle Pen

Perhaps there was no greater influence on Bill Monroe’s career than Pendleton Vandiver, his maternal uncle and, importantly, fiddle teacher. In “Uncle Pen,” Monroe remembers his mentor’s life, focusing on his dance-hall rollicks playing tunes like “The Boston Boy” and “Soldier’s Joy” — also the name of a post–Civil War concoction made with whiskey, beer … and morphine.

Eschewing the last of these, our Uncle Pen cocktail is an update of this boilermaker of sorts. Cinnamon and apple are obvious complements, but tequila makes for a vegetal, somewhat spicy addition to this refreshing mix — perfect after a frolic on the dance floor or simply a long day of work.

INGREDIENTS
1 1/2 oz reposado tequila (I prefer Espolón)
3/4 oz lemon juice
1/2 oz cinnamon syrup
Dry alcoholic cider (I prefer Harpoon)

DIRECTIONS
Add tequila, lemon juice, and cinnamon syrup to cocktail tin with one ice cube, and shake briefly to incorporate. Strain into high-ball glass or tumbler with ice, and top with cider. Garnish with lemon.

Bangin’ Pot of Beans

My mom always loved to make beans. Typically, she would get a can of black beans and “doctor them up.” She always used more olive oil than you’d think necessary. “That’s what makes them good,” she’d say. But she also loved to soak some dry beans and get some flavor going. I took what I learned from her — and from my own experimentation — to create a pot of beans that can be used with just about any kind of meal.

Basically, this is a generic pot of beans that, once cooked, can be manipulated to eat in multiple settings … from Italian to Mexican and more, depending on what seasonings you have available. When I made this recipe the last time, I was listening to Chris Stapleton's Traveller.

INGREDIENTS
1 lb bag of dry pinto beans
2 medium carrots chopped
2 celery stalks chopped
1 medium onion chopped
3 cloves of garlic minced
1 bay leaf
1 smoked pork shank
2 Tablespoons or more of olive oil

DIRECTIONS
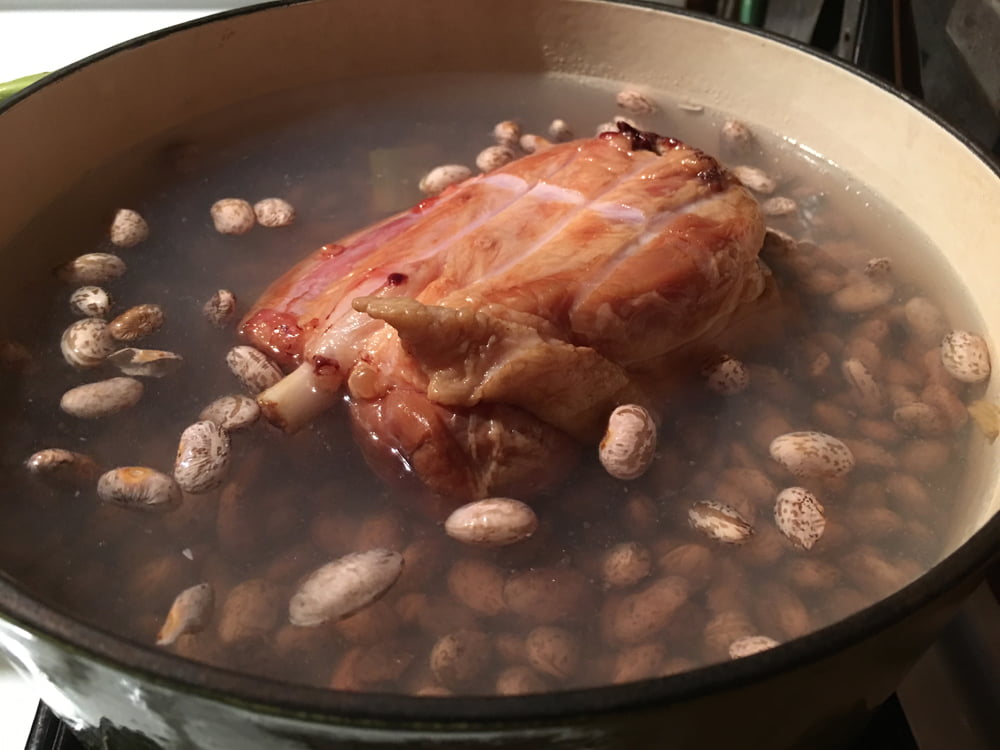
First, sort your beans and make sure there are no small pebbles or stones. Rinse them, then cover beans in a container or cooking pot with water to soak for at least six hours. Pour off water and place beans in a thick-bottomed pot, like a Dutch oven. Cover with water, at least two inches above the top of the beans. Place pork shank in the middle. Make sure most of the meat is covered by the water. (I typically push it down into the beans.) Turn on high heat until it starts to boil. Add bay leaf and back the heat down to medium-low and simmer for about an hour. Stir occasionally to make sure nothing is sticking to the bottom of the pot.

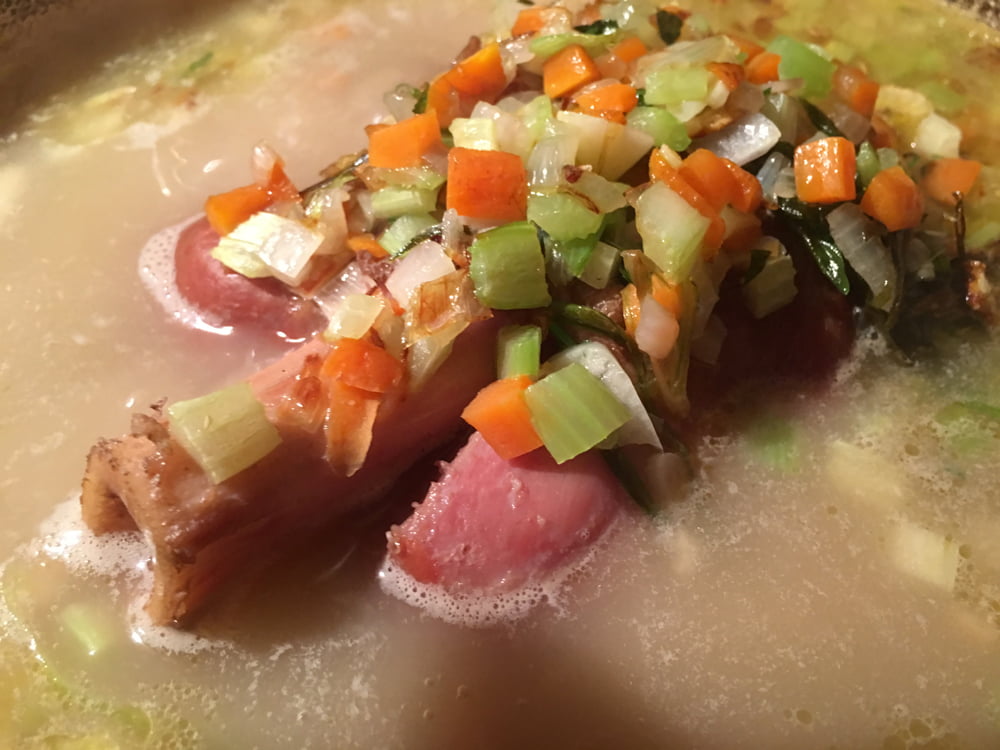
In a separate skillet, cook the veggies. Start by heating the pan on high heat. Add oil and coat the cooking surface of the pan. Add aromatics to the hot oil and cook until translucent. Or you can take it a step further and let them get some caramelization/color on them. This is always a good step for a little extra flavor. Add veggies to the beans and stir them in. Simmer until beans are tender and the meat is falling off the bone.

Salt and pepper to taste.

Serving suggestions for an Italian flair:

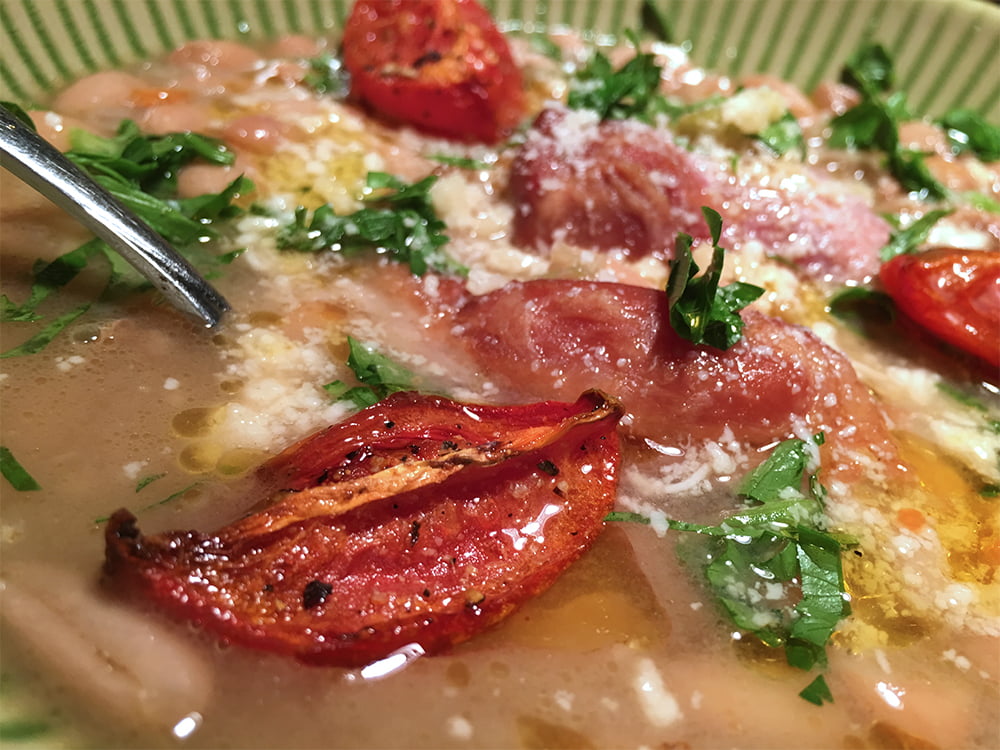
Fill your bowl with hot beans and a few pieces of the meat. Add some chopped parsley, some grated parmesan, 10-15 toasted pine nuts, a few oven roasted tomatoes, and finish with a squeeze of fresh lemon. Serve with some crusty Italian bread.

Serving suggestion for a Mexican flair:

Fill your bowl with hot beans and a few pieces of the meat. Add some chopped cilantro, a small pinch of dried Mexican oregano, a small pinch of ground cumin, and finish with a squeeze of fresh lime and your favorite Mexican hot sauce. Serve with some tortilla chips.


Frank Solivan fronts the Dirty Kitchen band. Their latest album — Family, Friends, and Heroes — will be released on March 4.

Chocolate Pudding Cake with Caramel Sauce

I have never in my life experienced a total flavor hole-in-one like this dessert. That is not to say there isn't another dessert that tastes this good. It would just be a challenge to find one that had all the mandatory components of a perfect dessert like this one: gooey chocolate cake that is served still warm, fluffy around the edges and soft in the center … add to that the heavenly mouth feel and buttery snap of home made caramel sauce and FORGET. ABOUT. IT.

This is a one-two punch of just what you're looking for in a holiday dessert — maybe even in life, in general. To lighten the mood just a bit, I add a nice, puffy cloud of hand-made whipped cream with just a hint of vanilla to the top of this beautiful inferno of sugar and joy.

To hear about this perfect creation and the love it spreads is made all the more ridiculous by one very important fact: A warm chocolate pudding cake with caramel sauce and vanilla whipped cream IS SO EASY TO MAKE, YOU ARE GOING TO CRY. Weep with Joy. It will renew your faith in mankind and have you shouting from the roof tops, "HAPPY HOLIDAYS … everyone!"

Let's get this party started … with a little help from Sharon Jones & the Dap Kings!

Warm Chocolate Pudding Cake with Caramel Sauce and Whipped Cream

CARAMEL SAUCE INGREDIENTS
1 cup packed light brown sugar
1/2 cup heavy cream
4 tablespoons of SALTED butter
Pinch of sea salt

DIRECTIONS
Mix the brown sugar, heavy cream, butter, and salt in a thick-bottomed sauce pan over medium-low heat. Cook while whisking gently for 5 to 7 minutes, until it thickens and slowly moves down the back of a metal reason. Turn off the heat, cool slightly, and pour the sauce into a jar. Refrigerate until cold.

Make this first so it can cool while you make the cake.

CAKE INGREDIENTS
Butter, room temperature, for baking dishes
1 cup granulated sugar, plus more for baking dishes
7 large eggs, room temperature, separated
6 ounces, semisweet chocolate, melted
6 ounces, milk chocolate, melted
1/2 teaspoon salt
6 4 oz soufflé cups

DIRECTIONS
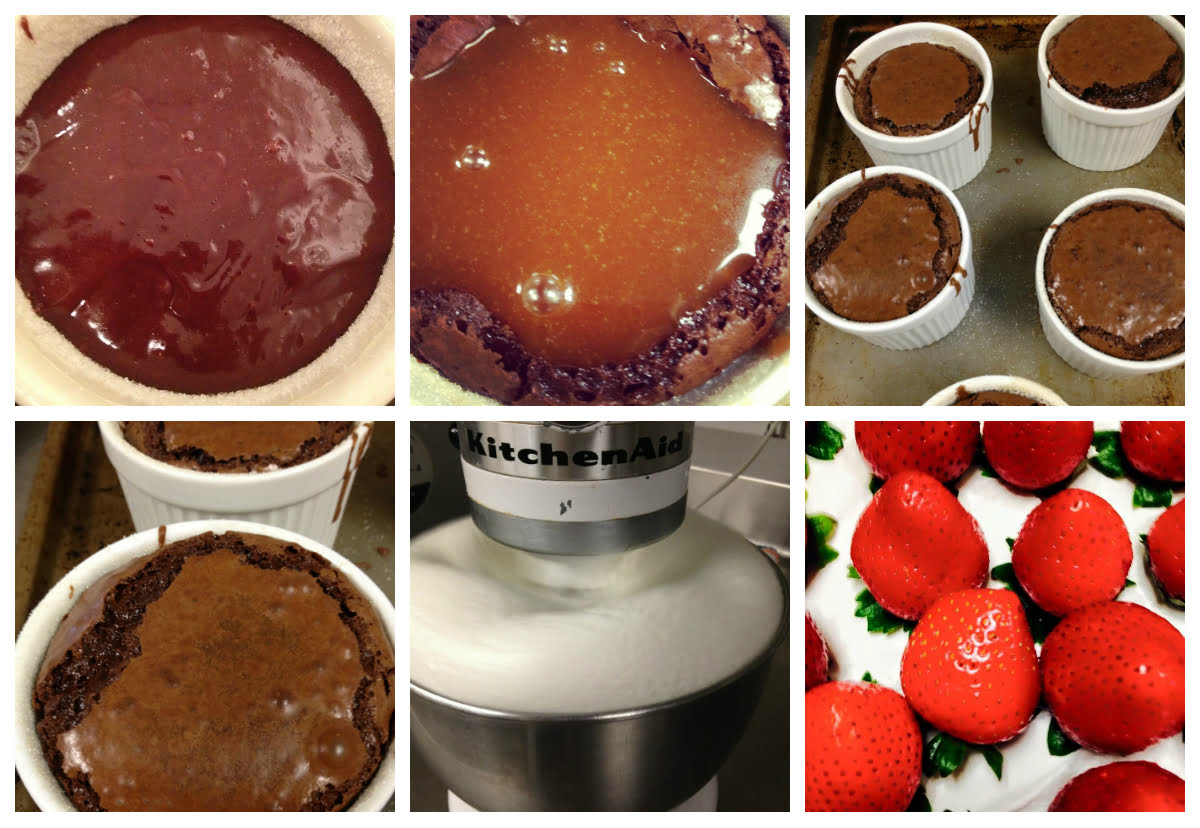
Preheat oven to 350, wipe the inside of the soufflé cups with butter, and tap in a layer of sugar to coat the inside.

Separate egg whites and yolks. Mix the yolks, salt, and sugar together until smooth and set aside.

Melt the chocolate and add slowly to the egg mixture in small spoonfuls. (You don't want to scotch eggs with hot chocolate, so you add it slowly to temper the eggs.)

Let the mixture sit for a moment and rest.

Using an ice cream scooper, scoop mixture into soufflé cups. Let the cups sit in fridge for about 5 minutes then bake for 15-20 minutes. Adjust time, if your oven runs hotter or colder.

SPICED WHIPPED CREAM INGREDIENTS

1 pint of heavy cream — very cold
1 teaspoon vanilla
One teaspoon cold coffee
Pinch of cinnamon
Pinch of ginger
1/2 cup confectioners' sugar

DIRECTIONS
Mix ingredients in a blender, food processor, bowl, electric mixer, or KitchenAid until light and fluffy.

Eat it on everything!


Chef Saskia Nugent is a native of Cape Ann, Massachussetts, a mom, a wife, an animal lover, a part-time comedian, and a full-time flavor junky.

Chef Barry Maiden Gussies Up Thanksgiving Leftovers … Kentucky Style

Earlier this year, Chef Barry Maiden won the much-coveted James Beard Award for Best Chef: Northeast. The award is only the latest in his acclaimed career. Whether as chef/proprietor of Boston’s Hungry Mother and State Park restaurants or as a faculty member in Boston University’s Culinary Arts Program, Maiden has always brought his Appalachian roots along with him.

Born in Southwest Virginia, he got his first taste for cooking in his grandmother’s kitchen before heading into the professional world with jobs at Shoney’s and, eventually, the Martha Washington Inn. Soon enough, Maiden moved to Nashville to study under and work with renowned French chef Emile Labrousse who encouraged Maiden to attend the New England Culinary Institute.

Degree in hand, Maiden landed a job at L’Espalier in Boston, then transitioned to Sel de la Terre and Lumiere, before opening his own establishment — the Appalachia-goes-to-France-themed Hungry Mother — in 2008. The following year, Food and Wine named him Best New Chef and Maiden was off to the races.

He opened the Southern sophisticate State Park in 2013 with a menu that included Memphis BBQ spaghetti, Nashville hot chicken, and Kentucky Hot Brown sandwiches. In order to pursue other opportunities, including the BU faculty position, Maiden bowed out of both State Park and Hungry Mother this year. Today, though, he’s here to give us his best Thanksgiving turkey tips.

What’s the single biggest mistake people make preparing turkey?

Buying a frozen bird then submerging it in a wet brine, and then overcooking it. Yum!

What’s a great, unexpected, and simple side dish?

Sautéed collard greens with hot pepper vinegar — helps keep things moving and the acidity cuts the richness of everything else.

Stuffing, mashed potatoes, or yams?

Tough one but, if i had to choose, it would be stuffing … BUT only stuffing made with cornbread and oysters. Otherwise, definitely mashed potatoes. Life’s too short for shitty stuffing. 🙂

Best pumpkin dessert … GO!

The one without pumpkin in it! Why is this tradition?! Buttermilk pie all day long.

What are the ABCs of Thanksgiving leftovers

One word [or three] … Kentucky Hot Browns!

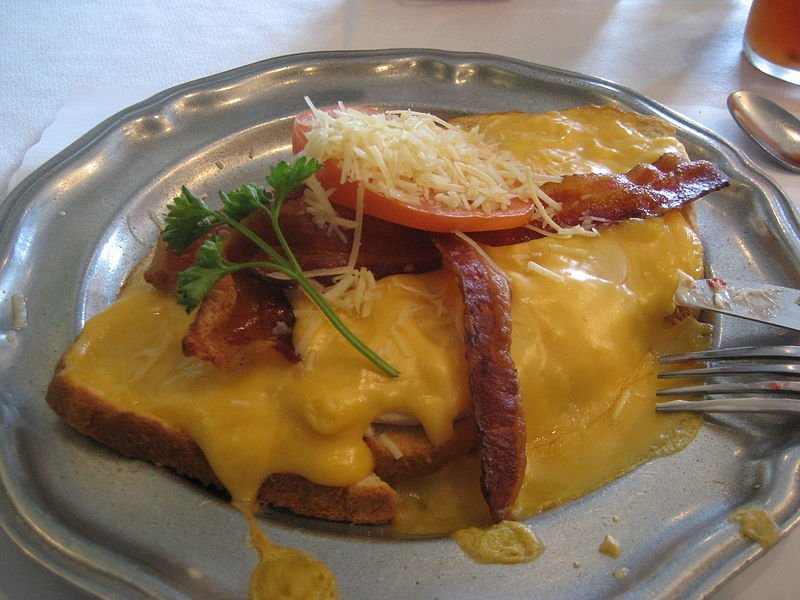
[Kentucky Hot Brown sandwich from Kurtz Restaurant, Bardstown, Kentucky, USA. Photo credit: Shadle.]

KENTUCKY HOT BROWNS (FOR LEFTOVERS)

I grew up about 50 miles south of Kentucky and, because hot browns were so popular, many variations existed in local diners … and even gas stations. Some versions including ham or sausage existed in parts of Virginia and were often served on a biscuit or grits instead of toast. Besides needing an excuse to add cheese, gravy, and bacon to your leftover turkey sandwich, I think Thanksgiving is the perfect time to revisit this Southern classic.

Ingredients

4 tablespoons unsalted butter
4 tablespoons flour
2 cups whole milk
2 cups heavy cream
1 cup sharp yellow or white cheddar cheese
1-1.5 pounds leftover turkey breast or leg, sliced
4 thick slices of pan de mie bread, buttered and toasted
8 slices of tasso ham or other good quality smoky bacon
4 ea. scallion, chopped for garnish
bourbon barrel-smoked paprika for garnish (or any smoked paprika)

Instructions

Make a roux by melting butter in a sauce pan and whisking in flour until a thick paste forms. Continue cooking over medium heat, whisking continuously, for two minutes and the roux is a light blonde color. Add milk slowly, whisking to combine and ensuring there are no lumps. Bring to a simmer, stirring often. Once sauce reaches a simmer, allow to cook for 10 minutes. Remove from heat and whisk in the cheese. Season with salt and freshly ground black pepper.

Build hot browns by placing toasted slices of bread in an oven-safe dish. (You can use one dish for hot browns or individual dishes.) On top of toasted bread, add sliced turkey. Pour cheese sauce over each hot brown. Place under broiler until cheese sauce is brown and bubbly.

Remove from oven. Top each hot brown with tasso ham and garnish with cut scallions and smoked paprika.


Lede photo credit: hagwall / Foter.com / CC BY

Spotlight: Hannah Messinger, Nothing But Delicious

Nashville's Hannah Messinger is no stranger to the word delicious. The writer, photographer, and now newly appointed Brand Manager at POP Nashville (a restaurant group featuring Little Octopus, one of Nashville's best new offerings) spends a lot of time around amazing food and drink. So it's no surprise that she named her blog — which features recipes, photography, and more — Nothing But Delicious

"I wish I could say that I had any kind of vision, that I had thought it through, that I had a plan," Hannah says, "but I can't. The truth is that in 2011, I started my blog because I hated office food. You know what I'm talking about? The sheet cake? The BBQ? The drink-it-down-and-don't-ask-questions kool-aid that management surreptitiously leaves in the break room to boost morale?

"Nine months into my desk job booking rooms for a hotel chain, my blog started as kind of a mantra. Nothing. But. Delicious. Before I put anything into my mouth, I would ask myself, 'Is this actually good, or am I eating it because it makes me feel like I'm making extra money by not paying for lunch?' Once I got into the habit of eating well, the world around me seemed to blossom with opportunity. Every night was a chance to learn a new recipe, and each new recipe was a chance to make tweaks and develop my own dish. I was surprised at how much I had to say about all of it, so I wrote it all down and, well, that lead me to where I am today — a food writer, stylist, and photographer. I have styled two local cookbooks, a handful of articles for big magazines like Better Homes & Gardens, and have been featured in Food & Wine Magazine."

We've pulled a handful of our favorite photos and recipes from Hannah's blog and Instagram for your viewing (and eating) pleasure, just in time for the holiday season. 


A photo posted by Hannah (@hmmessinger) on

Portrait of the blogger on a cheese-finding mission in Denver, CO.


A photo posted by Hannah (@hmmessinger) on

Cranberry relish pie — recipe here


A photo posted by Hannah (@hmmessinger) on

Styled table from a Christmas dinner at Acme Nashville


A photo posted by Hannah (@hmmessinger) on

Tomato Mayo Pie — recipe here.


A photo posted by Hannah (@hmmessinger) on

Creme Fraiche cookies — recipe here.

MONTH OF MEAT: The Birds and the BBQs

Sweet goodness. It’s a month of meat.

This go ‘round, we’re taking our cookbook Out of Our Kitchens literally. Fire up the charcoal. We’re facing our fears. Time to chain up, ladies and gentlemen, because we’re grillin’.

And because we’ve got the meat munchies this month, we want to take the opportunity to touch on the holy trinity of grilling: chicken, ribs, and pork belly. To ensure we’re steadfast in our carnivorous crusade, let’s start with the ABCs of barbecue — how to make the perfect BBQ sauce and cook us one hell of a bird.

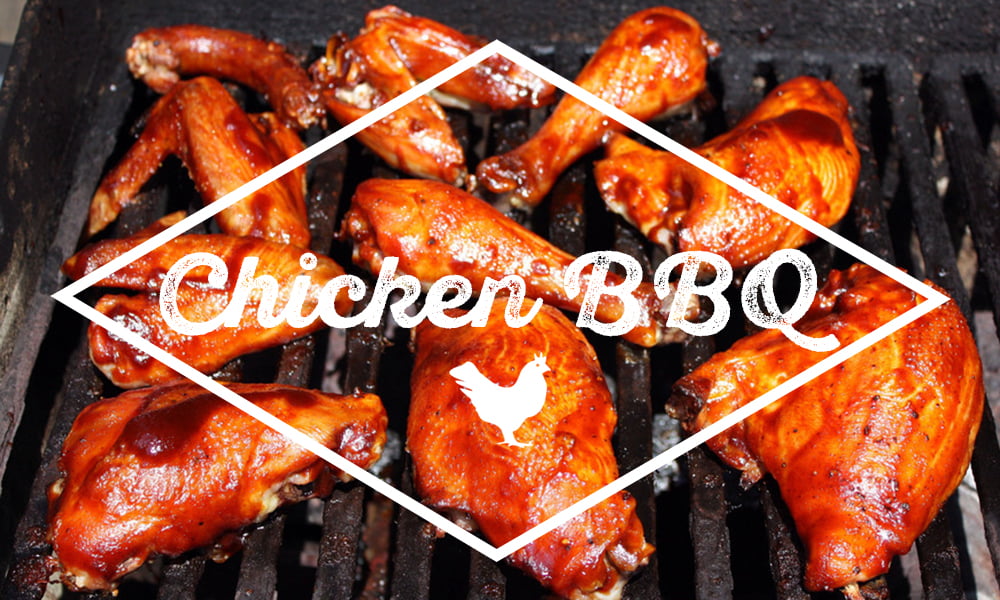
Barbecued Chicken
-Original recipe by Mary Koehler of Fair Haven, N.J. (A fine American, I’m sure.)

3/4 cup water
3/4 cup brown sugar
1/4 cup apple cider vinegar (Because that’s how we roll, but I’m sure white vinegar works, too.)
1 cup catsup (That’s right! This recipe actually called for “catsup!” We made two different batches of this: one with the Plumb Catsup we made back in June, and the other with store-bought tomato ketchup. The sauce made with Plumb Catsup was INFINITELY BETTER. Treat yo’self.)
3/4 cup Worcestershire sauce (however you say it)
1/4 cup lemon juice
4 tsp. dry mustard
4 tsp. paprika
4 tsp. salt
2 tsp. chili powder
2 tsp. cayenne pepper

This is how they do it: 

"Mix together. Salt cut up chicken to taste. Place in casserole and spoon the barbecue sauce onto the chicken being careful to cover each piece. Cover and bake at 500 degrees for 15 minutes, then reduce heat to 375 degrees and bake for 1 hour and 45 minutes. Remove the cover for the last 20 minutes and baste several times."

This is how we do it (for your grilling pleasure): 

FOR THE SAUCE: Combine all of the barbecue sauce ingredients in a bowl, and whisk together. Pour liquid into a saucepan and bring to a boil over high heat on a stovetop. Once mixture reaches a boil, turn down to simmer (something like medium-low heat) and stir frequently for the next hour. DON’T SKIMP ON THE STIRRING. This stuff will burn and stick to the pan, so be attentive. If the sauce is still watery after the hour is up, let it continue to simmer for an extra 10 or so minutes — show it some love. Once the sauce has thickened and is still piping hot, pour into sterilized jars and seal lids. (The above ingredients yield a little more than a pint of sauce.) Store in dark place — think pantry or cupboard, rather than cavern or well.

THE NIGHT/EARLY MORNING BEFORE: Brine your bird. Thanksgiving turkeys aren’t the only fowl that like a good soak. You can’t swing a dead cat without hitting a brining recipe online (there’s a ton of them), but we wanted to keep it simple. Take 6 cups lukewarm water and whisk in a heaping 2/3 cup of salt and a heaping 1/3 cup of sugar until they dissolve. To keep things “NEAT” and “TIDY” (the way my grandmother liked it) put your chicken parts (we bought a 4-pound bird from a local meat market, had them break it down) into a gallon storage bag, and then put the bag into a large plastic bowl so nothing will tip over. (Smart, right?) Next, pour the brine into the bag and remove as much air as you can, seal it, and give everything a generous shake. (Feel free to do this in time with the melody of Billy Joel’s “We Didn’t Start the Fire.”) Let it sit in the fridge for 6-8 hours.

THE DAY OF: After the chicken has brined overnight, pour out liquid and pat it dry before putting it on the grill. Rub the chicken pieces liberally with the barbecue sauce you made earlier. I am broke so I don’t have a charcoal chimney (one of those things you heat up the coals in), but if you got one, light it up about three-quarters full. When the coals are heated through and gray, pile them on one side of the grill, keeping the other side empty. (Also, if you’re a fancy type and have wood chips, this would be a heck of a time to use them. Feel free to SMOKE THAT CHICKEN UP.) Make sure you oil your grates, rather than using a cooking spray; take pride in what you are using around your food — a halved onion on the end of a grilling fork dipped in olive oil is a great way to grease up your grill. Place chicken, skin side down, on the cool side of the grill and cover. Cook until chicken begins to brown (depending on the temperature of the grill this can take up to 30 or so minutes); check on the chicken mid-way through to make sure it’s not browning too fast.

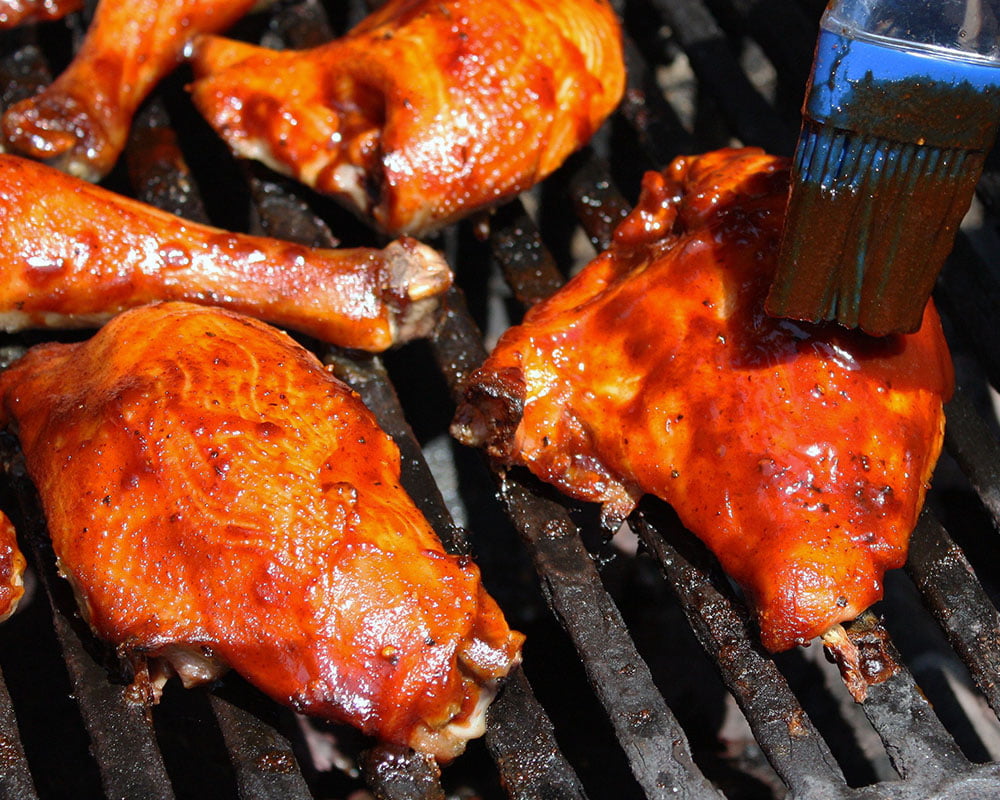
Next, move the chicken near to, but not over, the charcoal. (If your coals look like they are dying, you might need to add a handful to reinvigorate the pile.) Begin flipping over the chicken pieces and, shoot, since you’ve made it this far, start finessing that bird with your bangin’ homemade barbeque sauce every five minutes or so until sticky. Do this while you liberally sip a beer of your choice — 10-15 minutes. (If you’re like me, it may take two beers.) This is hard work. Make sure you enjoy the little things.

Once you get yourself that sticky chicken, move the pieces over top of the coals and continue to brush your bird until the sauce becomes crusty and caramelized. (The internal temperature of a chicken breast should be around 160-165 degrees; legs, thighs, and drumsticks around 175 degrees.) Use a meat thermometer to check on the done-ness of the chicken. Take the chicken off the grill when it reaches temperature. Serve extra barbecue sauce on the side to show your loved ones you care.

WET NAPS.