Red Cabbage Salad With Marcona Almonds & Blue Cheese

Tasting new foods with people I love accounts for many of my favorite memories. I think of baking a pie with my dear friend Shannon, after we were inspired by the “Pie-Maker” from a show called Pushing Daisies. It was filled with a white chocolate ganache, orange zest, macadamia nuts, and a drizzle of dark chocolate on top. It was delicious and whimsical.

Before my husband and I were anything, we were friends who constantly talked about food and music. (Okay, so maybe we liked each other, but neither of us said anything for a while.) Once, he came over to help record some demos of my songs. Afterward, we decided to make eggs benedict for dinner. In case you were wondering, it is challenging to poach eggs while trying to appear cool and casual in front of for the person you are falling for.

Still today, we spend a lot of time in the kitchen together. We eat at home more often than not, but every now and then, we love to save up and go somewhere really wonderful. Last month, it was new restaurant called Barcalona. We were hesitant to go, partially because it is somewhat of a chain and partially because we have been dissapointed by many hip-looking restaurants that have sprung up in Nashville. I am happy to report that the food is original, delicious, and resonablly priced. The wine choices are available in half glasses, which is wonderful news for the kind of person who wants to try everything.

One particular dish we had stole the show: a salad with cabbage, hazelnuts, pears, and a Spanish blue cheese called Valdeón. It was a perfect combination of flavor and texture. We decided we wanted to try try and replicate it. The tricky thing about recipes like this is that they seem simple, but can be difficult to execute. Still, I think my recipe turned out pretty damn good!

I used Marcona almonds instead of hazelnuts, simply because they are the food of the gods. I also added quinoa and roasted broccoli for some added texture and heartiness. 

I recommend pairing this salad with My Piece of Land by Amanda Shires.

Ingredients

For the salad:
1/4 head of cabbage
2 cups cooked quinoa 
4 cups water or vegetable broth 
4 oz blue cheese crumbled
16 oz cups broccoli florets 
1/2 teaspoon salt, plus more for seasoning 
1/2 cup marcona almonds 
1 pear thinly sliced pear, or 1/4 cup golden raisins if you can’t find a good pear
2 TB olive oil

For the vinaigrette:
1/4 cup red wine vinegar
1 tablespoon honey
1/2 cup olive oil
Kosher salt and freshly ground black pepper

Directions

Begin by turning the oven to 350. Place broccoli on roasting pan. Drizzle with about two tablespoons of olive oil. Mix with your hands and sprinkle with 1/2 teaspoon of kosher salt and a few cracks of pepper. Place in oven for about 30 minutes. Chop cabbage into longs strips, and then cut those in half, so they are shorter in length. Slice pear thinly.

Next, rince the quinoa until the water becomes clear. Combine quinoa with broth or water and bring to a boil. Cover and simmer until water is absorbed and quinoa is tender, about 15 minutes. While that cooks, blend the vinaigrette ingredients together.

Once the quinoa and broccoli are cooled, layer a serving plate with cabbage, quinoa, blue cheese, almonds, and broccoli. Drizzle vinaigrette over salad and serve at room tempurature or after being chilled for 30 minutes. 

Love’s Feast

I just got the glass out of my finger.

What a way to start a story. What am I thinking? Am I really about to be this honest about how clumsy I can be on a daily basis?

Umm, okay then … I guess this is happening.

Glassy fingers aside for a moment, though: Just so you know, I generally have the best of intentions when it comes to acting like I’m keeping it all together. You may believe that I’ve got most of it figured out (thanks, Instagram), but to tell you the truth — the only thing in my life that’s figured out is my ability to try and try again. I’ve got that down pat.

I don’t ever give up. I’ve contemplated it before (for real … who hasn’t?) but the undeniable force for why I continue to move forward is because I am motivated by Love.

Love finds me in my broken-down state and, like a mechanic, it replaces my proverbial flat tires. It finds me in a crowded room hiding in the corner and walks up to me to tell me the perfect joke to make me laugh, making me forget the insecurities that had me backed into that corner in the first place.

Love gives me assurance that just as I am, I am worthy.

When I feel this way, all I want to do is pay Love forward. That’s why I cook. More specifically, why I cook for others.

I can be so clumsy and scattered when I cook! I have such good intentions in the midst of the process. All I want to do is create something that will be worthy of repaying Love. Yet, I’m human and I’m just figuring it out as I go. I don’t get it all right. Sometimes my gravy gets lumpy and sometimes my couscous gets gummy. Love doesn’t judge my imperfection — whether in or out of the kitchen. Love gives me the freedom to express myself in an unguarded and ungraceful way, and it does not abandon me in the very moment of my courage.

With that kind of Love by my side, the most brilliant things begin to happen in my kitchen. I find a way to fix the broken gravy. I find a way to revive the couscous. I find a way to get the glass out of my finger from the bottle I broke because I had it too close to the edge.

We need Love now more than ever. Perhaps I sound like a broken record, but I can’t deny what I believe to be true. We need Love to step in when our backs are up against the wall. We need Love to reset us when things have gone askew. We need Love to tell us it’s okay when we clumsily break the bottle and get glass in our finger. Love is patient. Love is kind. And all that other good stuff.

Let us feast on Love as much as possible right now. I’ll Keep On Keepin’ On in my corner — and you make sure you do the same on your end.

Love,

Ruby

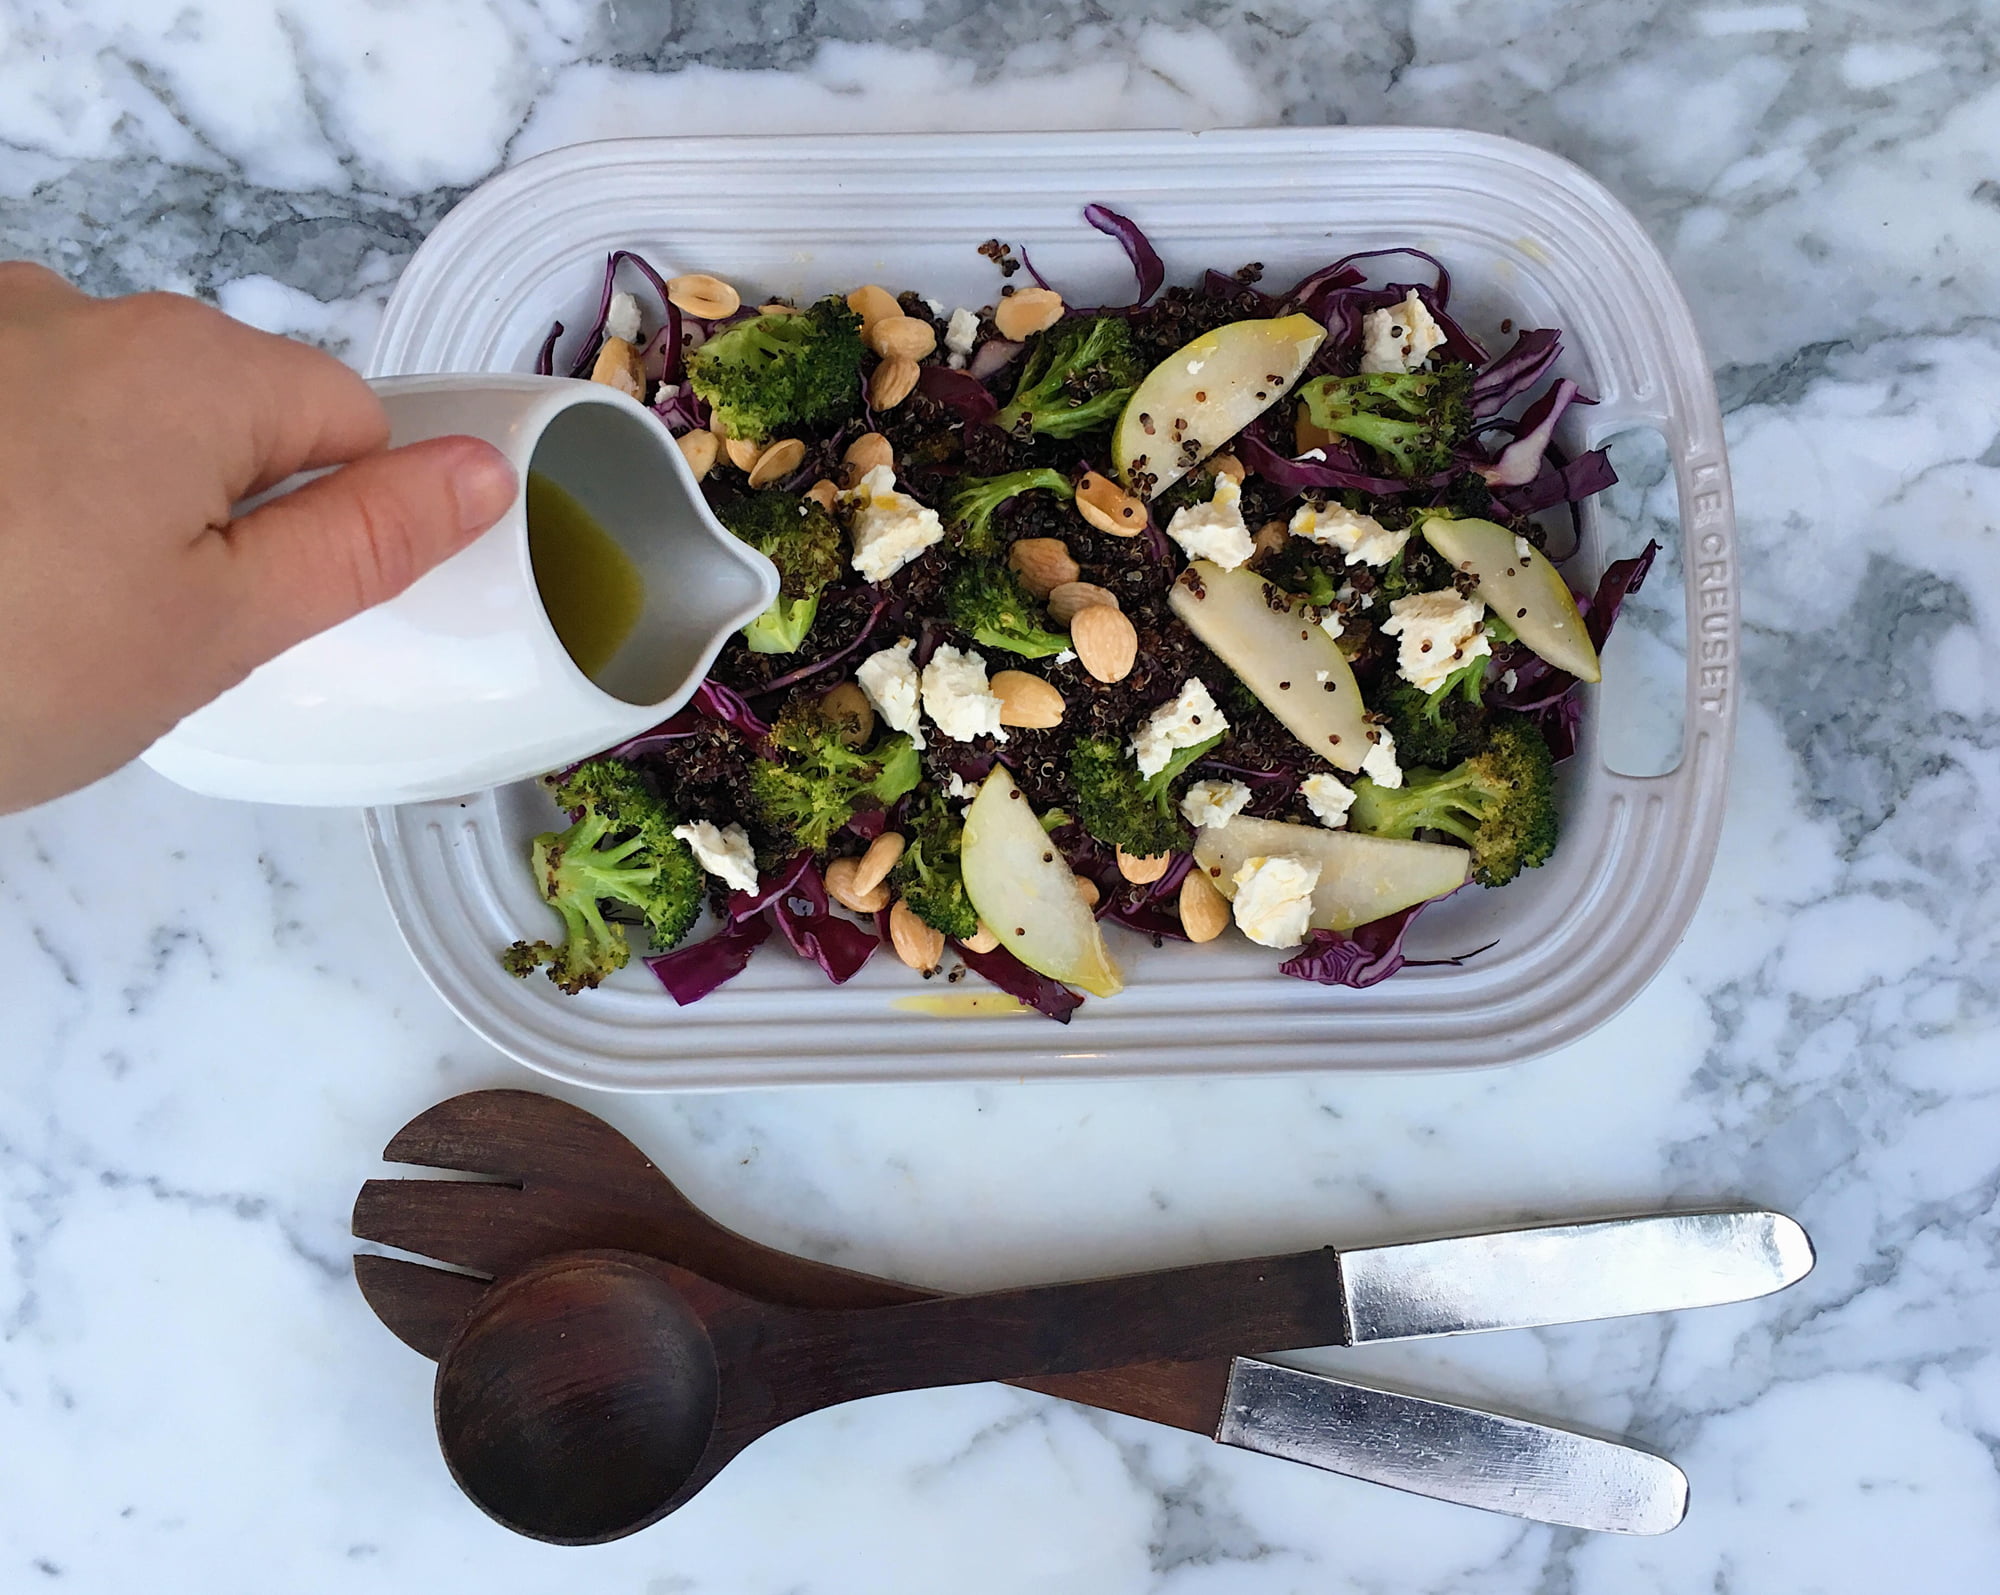
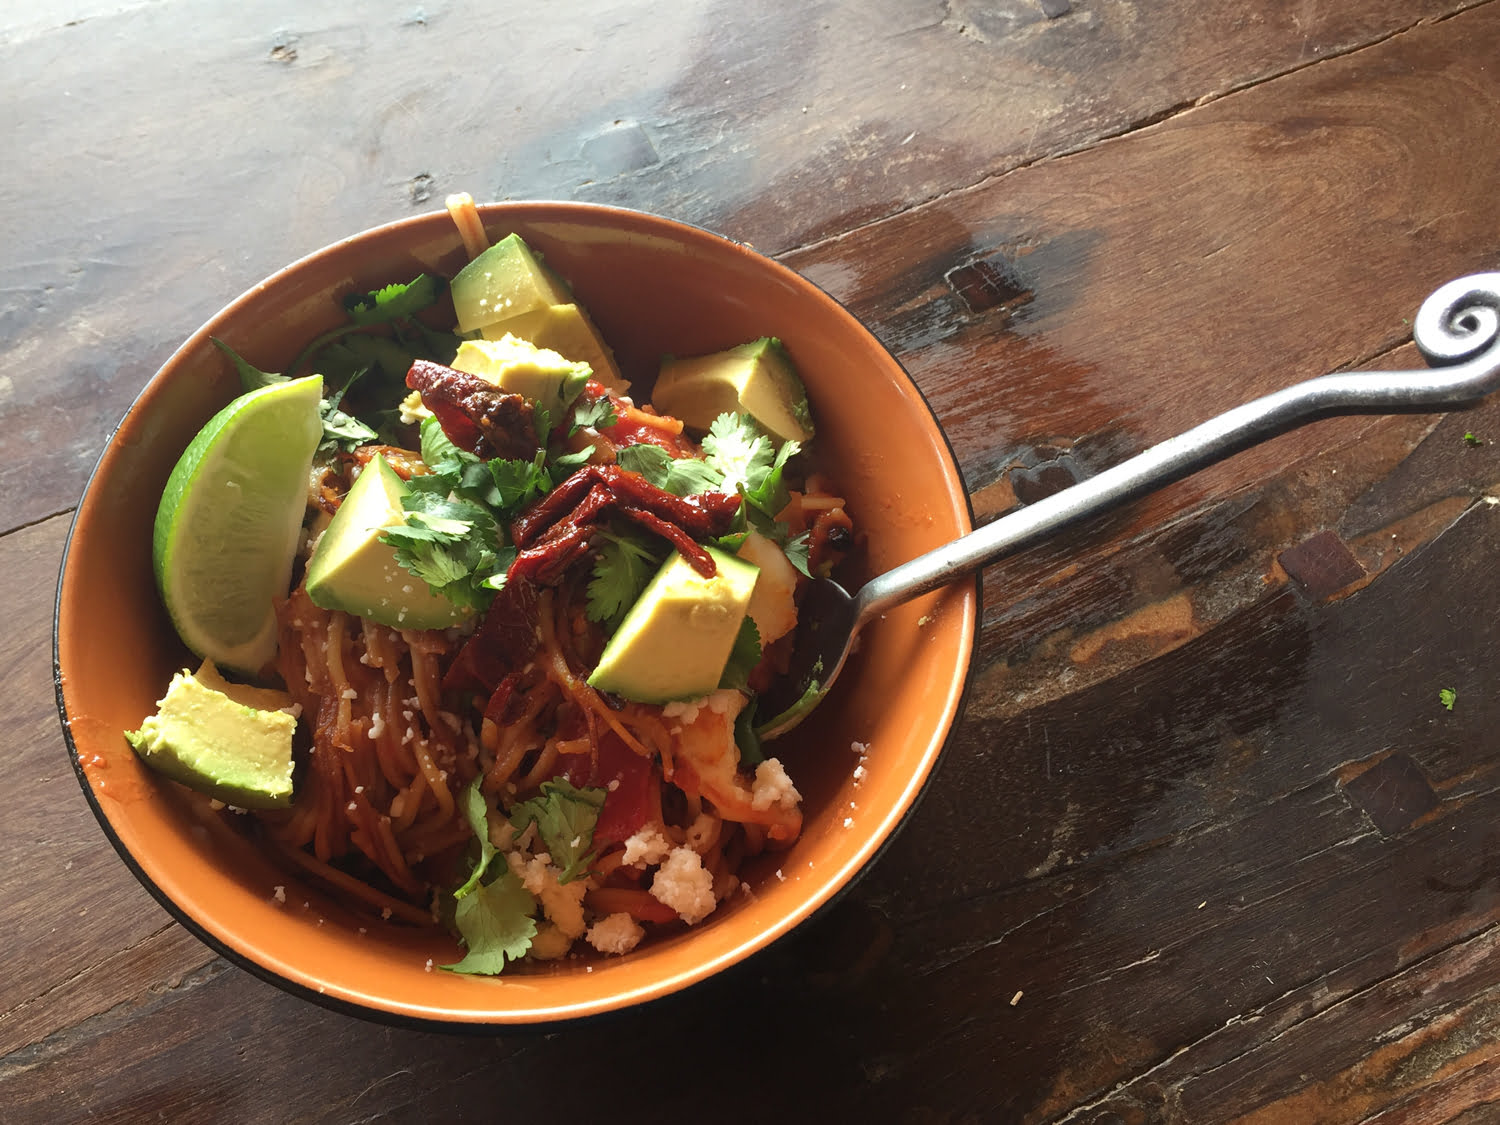
Here’s a meal that you can make for loved ones to express your gratitude for their presence in your life this month or any month. Just don’t put anything that’s glass too close to your counter’s edge. (There ain’t no metaphor there. Just tryna keep you safer than I was tonight.)

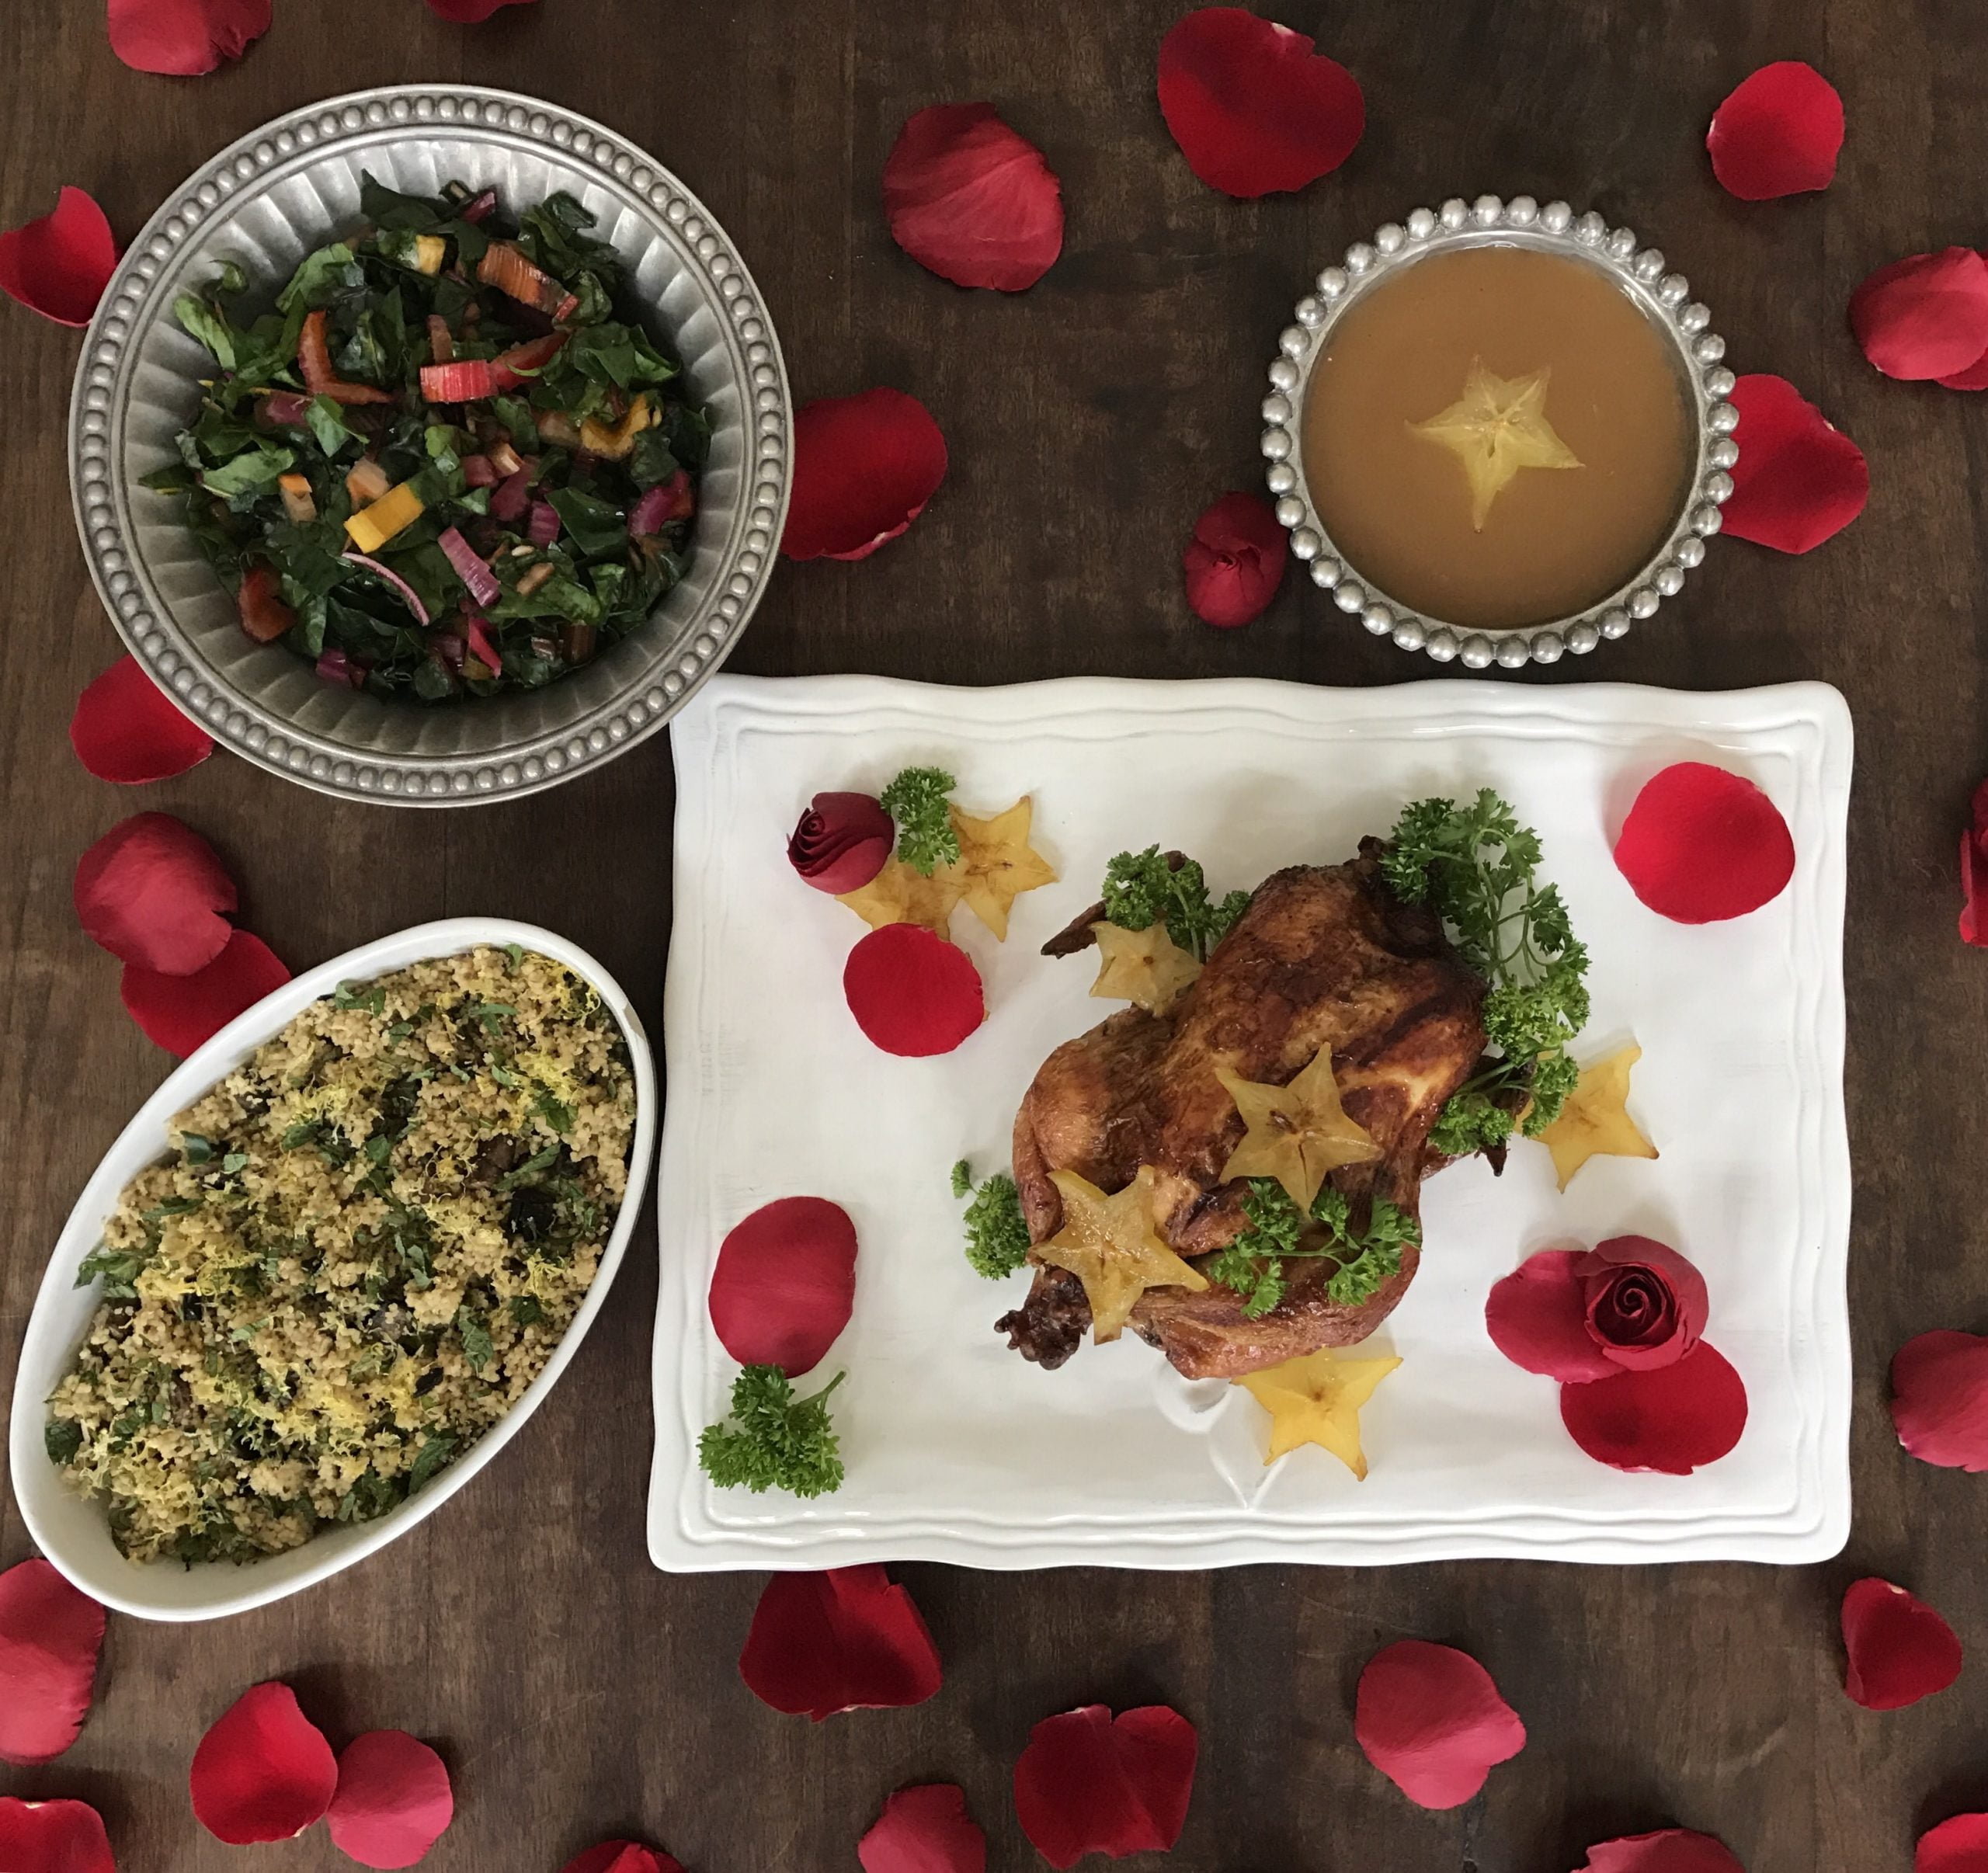
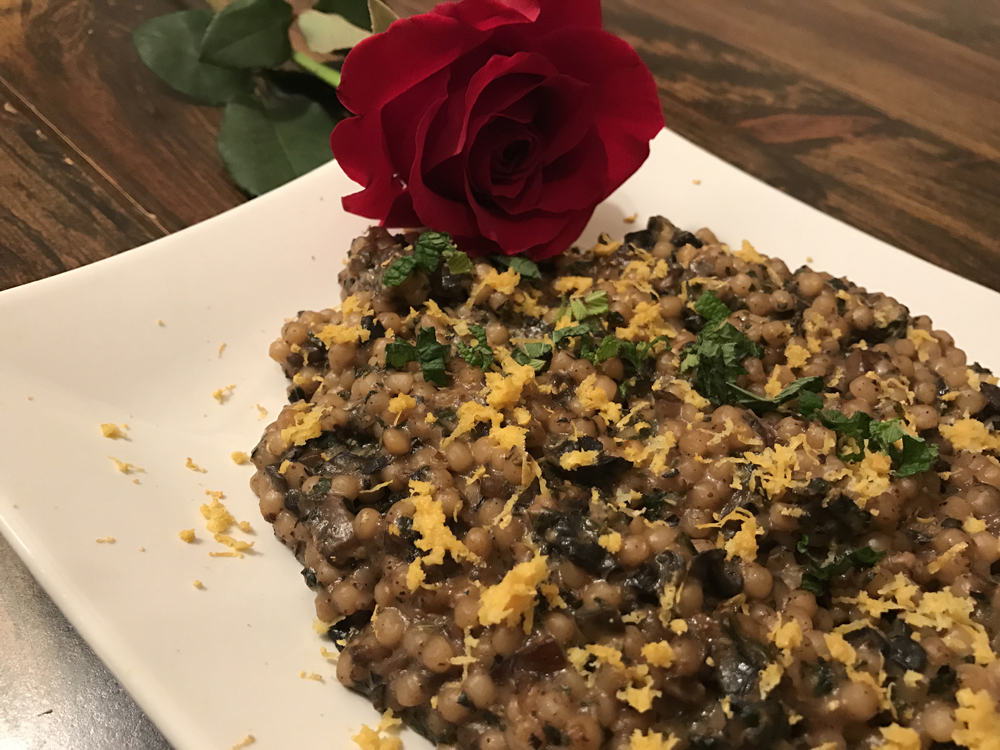
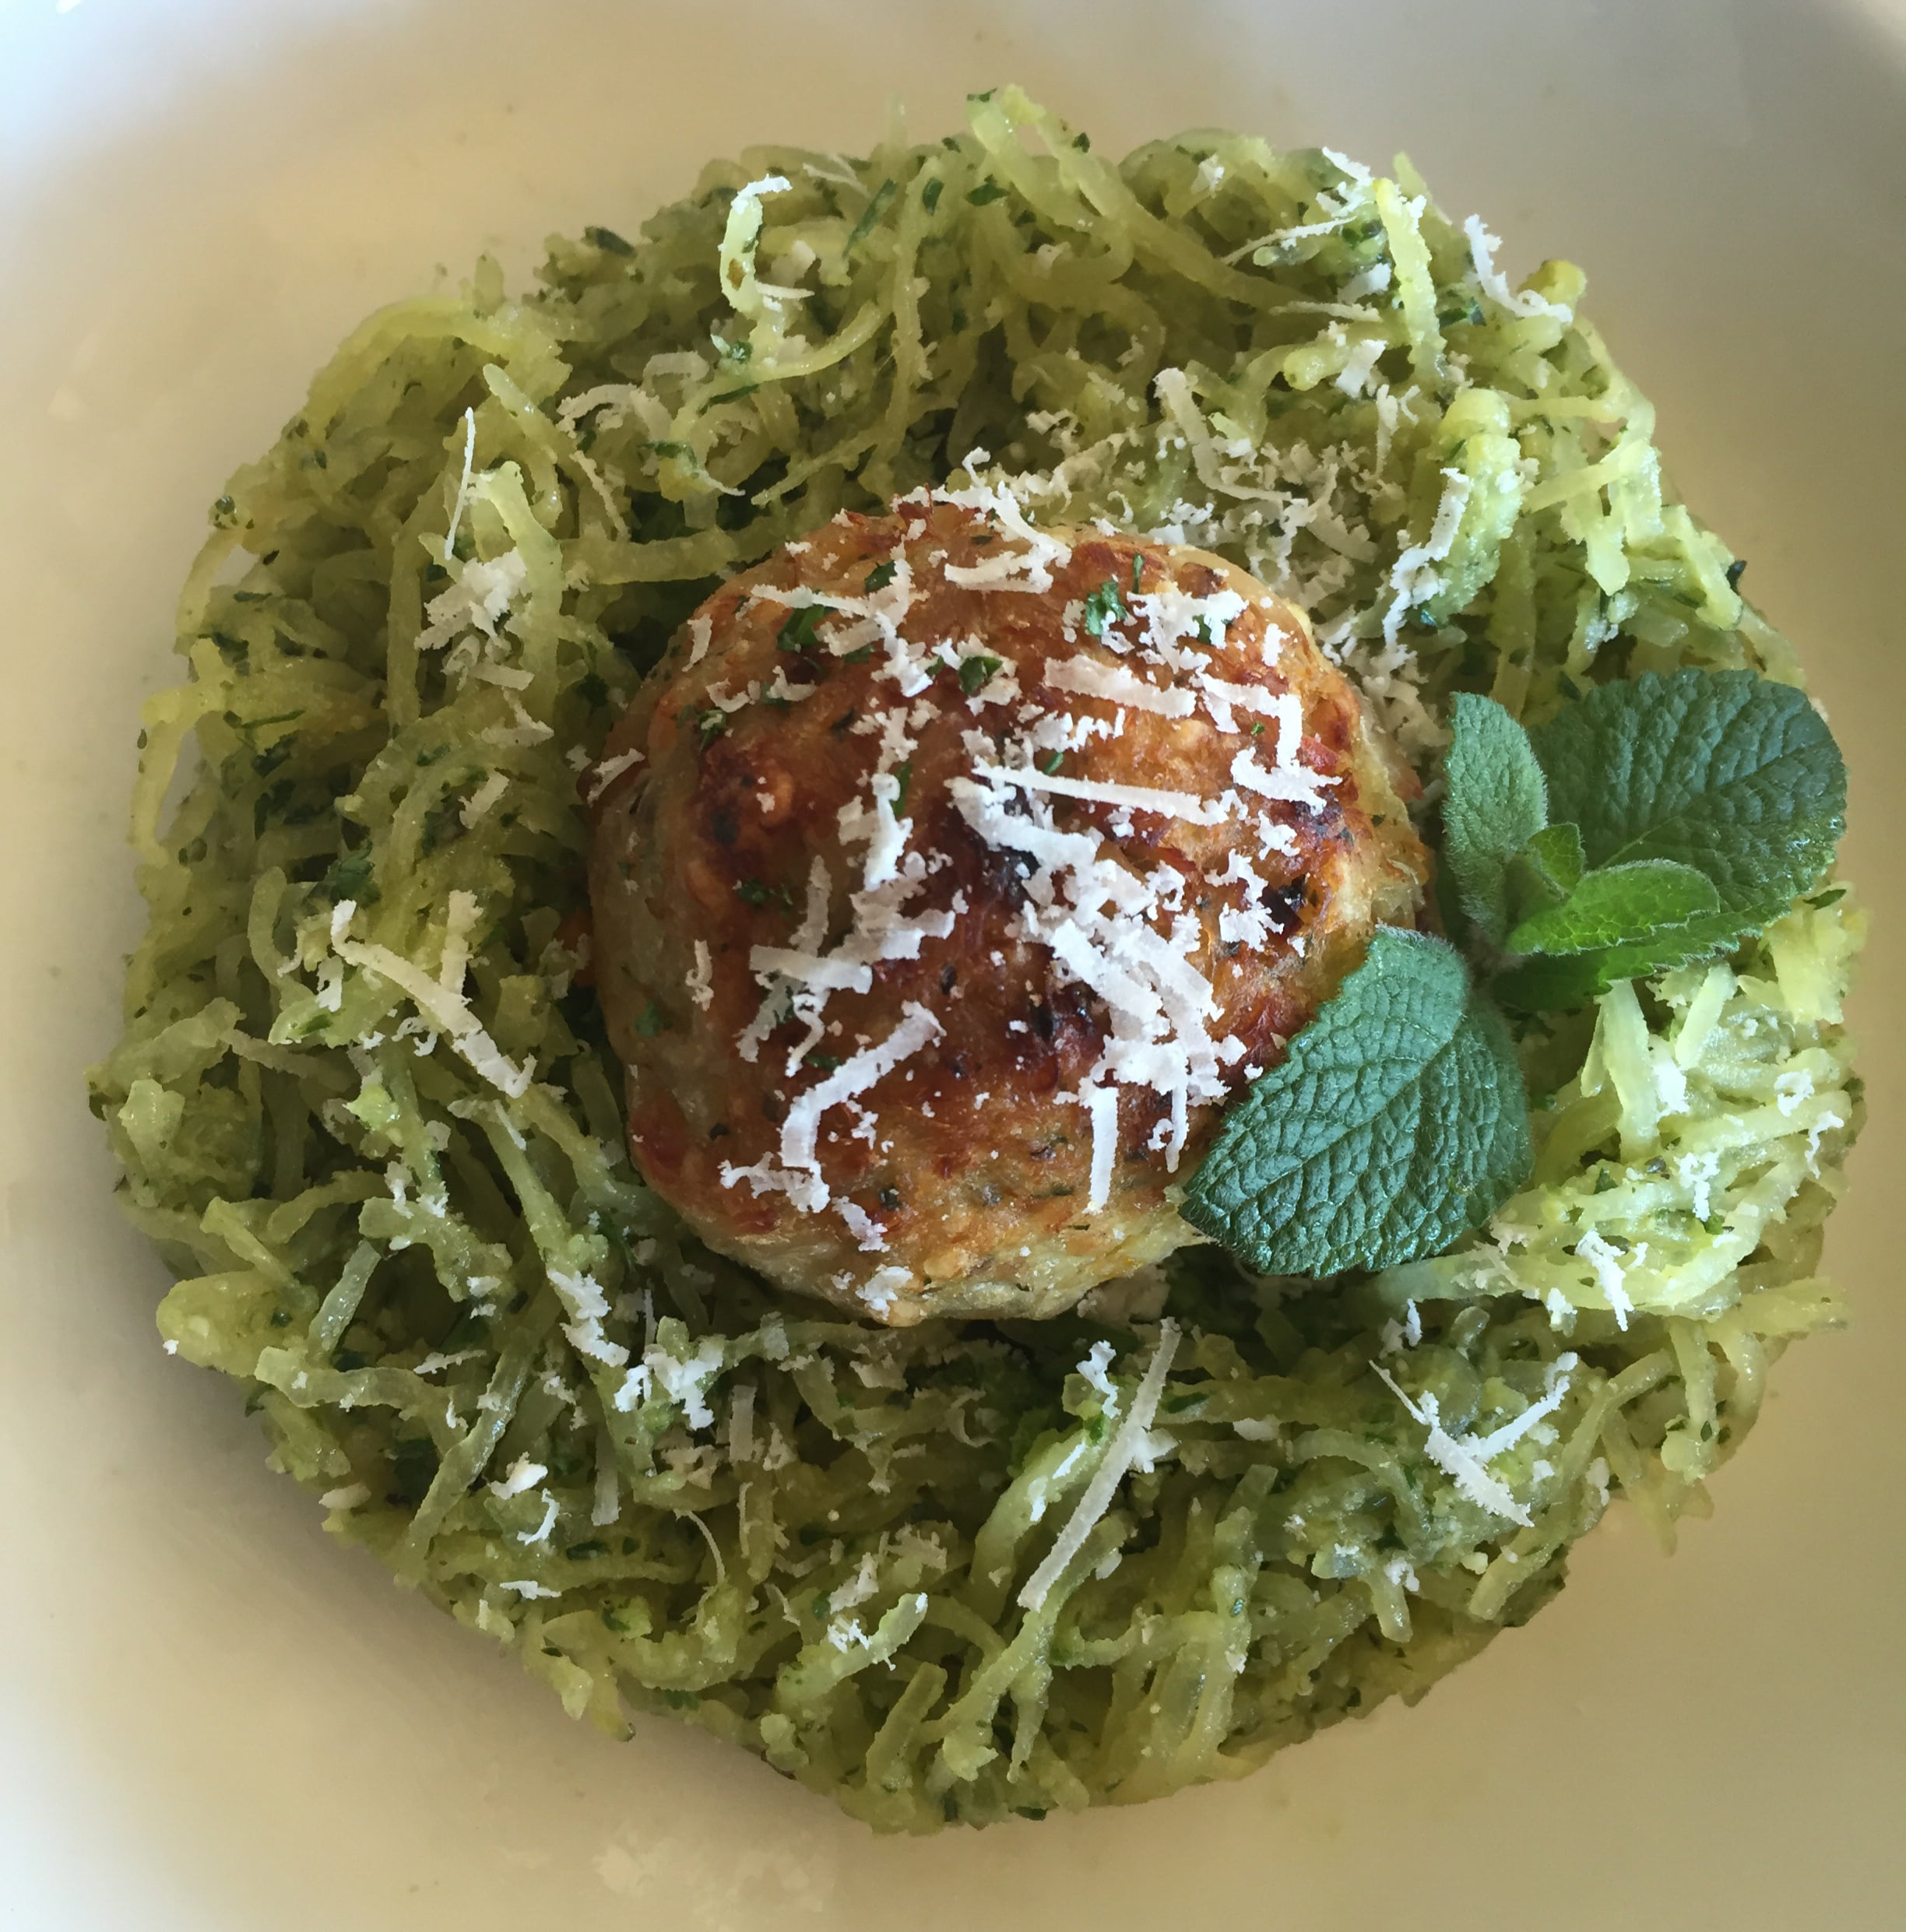
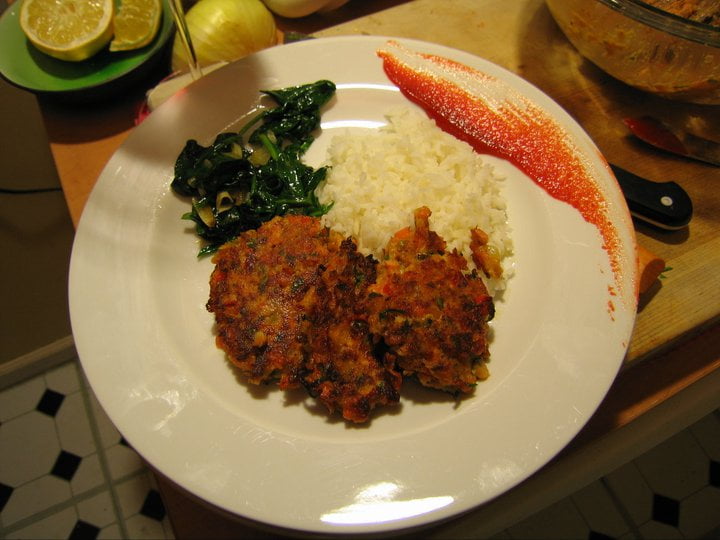
LOVE’S FEAST: Coriander Roasted Chicken & Starfruit, Portobello Mint Lemon Couscous, Wilted Greens, and Pan Gravy

INGREDIENTS

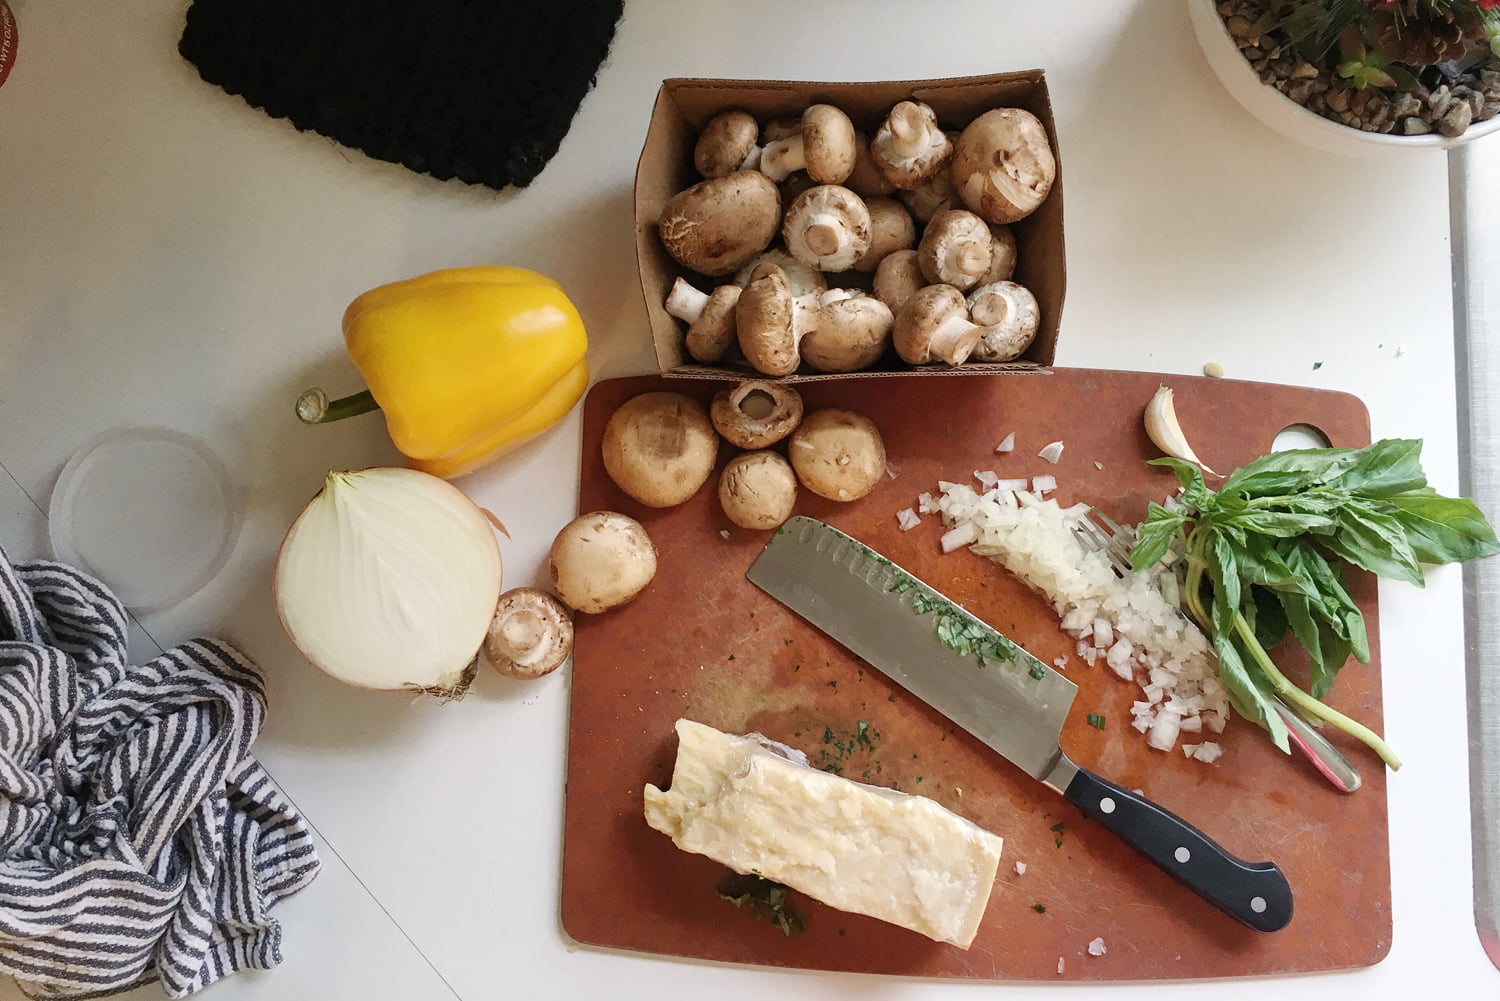
Note: With this recipe, it is very important that you do all of your chopping and slicing before you begin to cook.

One medium whole chicken (I buy antibiotic-free and/or organic chickens)
1 stick of softened butter
2 Tbsp grapeseed or safflower oil
1 Tbsp kosher salt plus extra
1 Tbsp ground coriander
1 Tbsp brown or raw sugar plus extra
1/4 tsp ground black pepper plus extra
1/2 head of garlic, peeled
1 medium sweet onion, quartered
2 whole starfruit/carambola, cut into 1/4 inch slices

FOR COUSCOUS

1 small box of quick cooking couscous, cooked to package instructions*
1-1.5 cups of portobello mushrooms, diced
2 Tbsp fresh mint (more, if you like)
Zest of one organic lemon
2 tsp olive oil
Juice of half a lemon

*Whatever kind of couscous you choose — Israeli or small grain — will be fine. The Near East brand makes various fun flavors to choose from, or you can buy any plain variety and add your own ingredients like grated parmesan cheese, a 1/4 teaspoon of truffle oil, etc. The sky’s the limit here.

FOR WILTED GREENS

1 Tbsp water
1 bunch rainbow chard, kale, mustard, escarole, or turnip greens, chopped into bite-sized pieces (brown stems discarded)
1 small sweet onion, thinly sliced
2 Tbsp apple cider vinegar

FOR PAN GRAVY

All roasting pan drippings
1 to 2 tsp corn starch
2 large shallots, thinly sliced
Roasted starfruit (reserve half of it for final plating garnish) + roasted garlic and onions from pan, puréed until smooth
1/2 cup white wine (Sauvignon Blanc preferable)
1 cup or more of chicken stock
Parsley for garnish

DIRECTIONS

Preheat oven to 450

Combine portobello mushrooms, mint and lemon zest and set aside.

Combine softened butter and oil in a bowl and incorporate well. Grease your roasting pan with 1-2 Tbsp of it, then massage the rest of the mixture evenly and generously onto and into the chicken. If there’s extra, put it inside the cavity.

Combine well salt, coriander, sugar, and pepper. Sprinkle evenly and generously over ENTIRE chicken and inside cavity. Massage it in, if needed, and sprinkle on more. There should be very little of the spice mixture left over, so get it into every nook and cranny.

Place garlic and onions inside cavity and place chicken in preheated oven. (I don’t truss it, personally.) After 30 minutes, flip the chicken over and cook for another 30 minutes, then re-flip the chicken and lower the oven temp to 400. Use foil to cover wing tips and breasts, if needed. Distribute starfruit slices evenly onto the roasting pan and roast the chicken and starfruit for a final 10 minutes. Remove pan from oven.

Use a spatula to transfer half of the starfruit (choose the prettiest slices) to a small bowl or plate and reserve for garnish. Use a spoon to transfer the remaining roasted starfruit, garlic, and onions to a blender or food processor and purée until smooth. Place pan drippings into a small sauce pot and set aside. Tent chicken with foil.

Prepare couscous. Once cooked, immediately fold in mushrooms/mint/lemon zest mixture, olive oil, and lemon juice. Salt and pepper to taste. Keep in pot, but set aside.

Take pot with pan drippings and heat to medium heat. When pan drippings start to lightly bubble, vigorously whisk in 1 tsp cornstarch (sprinkle it as you go; don’t dump it in). Add shallots and cook until just soft. Add in fruit, garlic, and onion purée and continue to whisk. Add the wine and chicken stock. Whisk like you mean it. Lower heat, if needed. If it’s too loose, whisk in 1 more teaspoon of corn starch. Lower the gravy to the lowest heat setting. Do NOT salt the gravy. It needs to be mellow to balance out the flavors of the chicken, which is very highly seasoned.

If you can multi-task, wilt your greens at the same time. If not, make your greens now. Add 1 Tbsp water to pot or pan and turn to medium high heat. Don’t let the water evaporate! Watch for the initial water bubbles and add the onions and greens straight in. Add the cider vinegar and toss to coat. Cover for 2 minutes and toss again. Cover for final 60 seconds and toss again. You shouldn’t need salt (especially if you use rainbow chard).

Transfer wilted greens to serving dish.

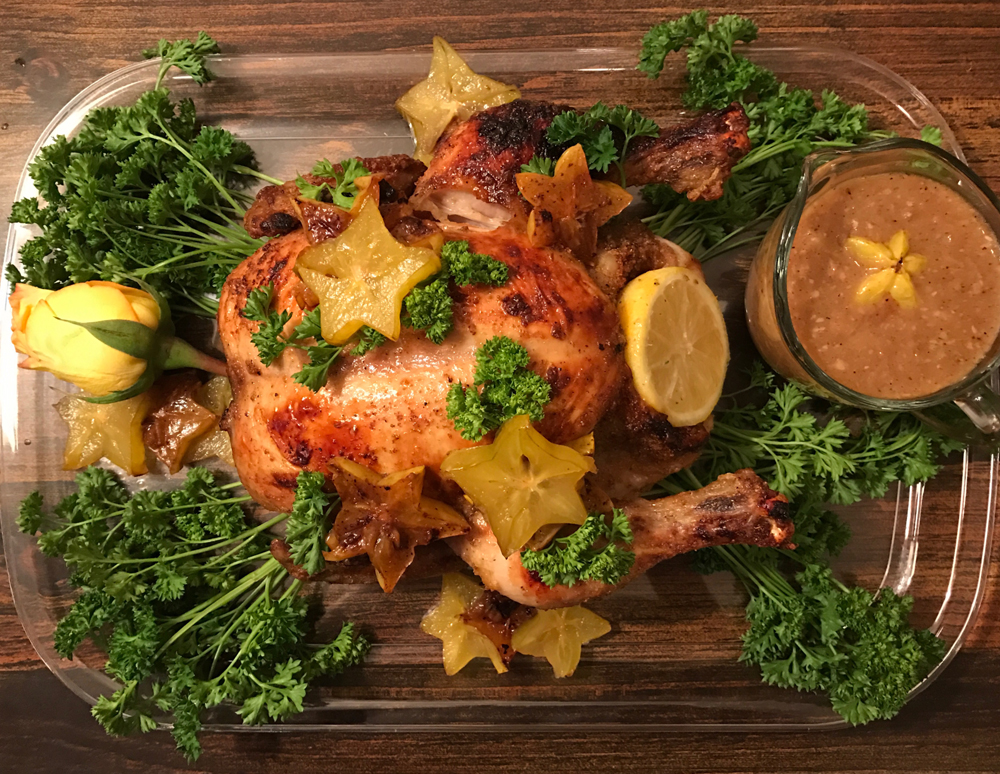
Plate your chicken and garnish with parsley and roasted star fruit.

Transfer couscous to serving dish.

Put gravy in a server.

Spaghetti Squash with Turkey Meatballs

Happy New Year! We have survived 2016, even though, as a friend put it, we have elected 2016 as president. But never mind that for now.

The new year can be an exciting time to start fresh and focus on our goals. It can also be overwhelming, as there’s so much to change and imrove. This anxiety extends to food and health. We may feel that we had a too many sweets during Thanksgiving or too many drinks during Christmas. We often resolve to cutting back and jumping into a workout routine, and the $60 billion diet industry is all too happy to “help” with that.

There is absolutely nothing wrong with jumpstarting one’s health with green juice or a new workout class. The problem is that we often make our resolutions too extreme and unrealistic. We expect habits that have been formed over a year to break with sheer determination in the first week of January. Then, we are hard on ourselves, if we don’t succeed.

The last two years, I’ve tried to take more stock of what I’m being formed by: Do I want the habits I have acquired? Instead of swearing off all delightful foods or drinks, I have tried to focus on caring for my body, eating nourishing foods, and getting enough sleep. This year, I want to be more consistent with Morning Prayer and carving out more time to be inspired for my writing.

Learning to balance my love for food and my desire to be healthy has been difficult. I love how a wonderful meal fuels a long conversation with friends. I enjoy trying new restaurants and having a glass of wine after a busy day. I also love the way I feel eating healthy foods and working out regularly. There have been several times in my life when I felt like I had to choose between these things — I had to eat a salad for most of my meals and have an intense workout regimen, or I needed to let that go and enjoy cream and desserts on a regular basis. Today, I try to live in the middle.

I love recipes like the one I am sharing for this reason. It’s a nice blend of light and satisying, perfect for a meal any day of the week.

I recommend pairing this with Nocona by Carey Ott.

Ingredients (Serves 4-6)
For the spaghetti squash:
2 medium spaghetti squash
Olive oil
Kosher salt
black pepper

For the meatballs:
1 pound ground turkey
1 large egg, lightly beaten
1 tsp kosher salt
fresh ground black pepper
1/2 cup seasoned breadcrumbs
1/4 cup grated parmigiano-reggiano cheese
1 Tablespoon fresh Italian parsley, chopped, or 1 teaspoon dried parsley
1 Tablespoon fresh basil, chopped
1/4 small white or yellow onion, chopped finely
1/8 cup milk or broth
1 clove garlic, minced
1 Tablespoon tomato paste

For the marinara:
3/4 medium onion, chopped (the remaining onion not used in the meatballs)
1 small bell pepper, chopped
1 cup button or baby portobello mushrooms, chopped
1 28 oz cans crushed tomatoes (I like Cento.)
1 16 oz can diced tomatoes
1 Tablespoon granulated sugar
2 Tablespoons balsamic vinegar
1/4 – 1/2 cup chopped basil
Fresh grated parmigiano-reggiano cheese

Directions
Begin by turning oven to 400 degrees.
Cut the Spaghetti squash in half and scoop seeds out of the middle with a spoon.
Lay on cookie sheet and lightly drizzle olive oil over the top and bottom of the squash. Use your hands to evenly coat, if necessary. Sprinkle salt and pepper on both sides. Lay squash down on cut side. Set aside.

Place all meatball ingredients in a bowl. Mix with wet hands to combine. Wash hands, and heat 2 teaspoons olive oil in a large skillet. Shape meatball mixture into 1.5-inch balls.

Place them one by one in the skillet and brown on high medium-high heat. Turn the meatballs and brown on the other side. Take out meatballs and place on a plate.

Place spaghetti squash in oven and cook for 30 minutes, or until it is tender when poked with a fork.

Wipe out pan and place back on stove with another drizzle of olive oil. Add chopped onions, sprinkle with a pinch of salt, and sauté for a few minutes on medium heat. Then add bell peppers and sauté for another few minutes. Add garlic and mushrooms and sprinkle another another pinch of salt. Cook all together for 2 minutes and add both crushed and diced tomatoes. Lower heat to low, and stir in sugar, balsamic vinegar, and chopped basil. Add meatballs and simmer for 30-40 min. Taste sauce, and add salt and pepper, if necessary.

Once the spaghetti squash is cool, use fork to scrape out squash into bowls. Spoon marinara and meatballs over squash. Top with shaved parmesan cheese.

Fideo Seco: Comfort Food Across Time

My grandmother was a horrible cook. She had many fine qualities, but cooking was not one of them. In her kitchen, nothing was ever cooked enough.

There was one dish, however, that I remember as always simply satisfying and consistently good — sopa seca de fideo. I remember this dish as a regular at every family gathering of four or more. Actually, everyone in my family had a version of it and, in some ways, that is the nature of it — flexible, open to interpretation, simple, and inexpensive. Basically, fideo is Mexican pasta, probably most familiar served in a soup as in sopa de fideo. Fideo seco leans toward casserole and can be made as a side or main dish, vegetarian or not. In Mexico, the sauce is most often made with chipotle, guajillo, and passilla chile. The version my New Mexico family made uses just green chile that is served and added to just about anything and everything in New Mexico. When preparing this dish for friends, I offer several bowls of garnish on the table for everybody to add as they wish — cilantro, lime, julienned chipotle chile, crumbled queso fresco or cotija cheese, and avocado. The recipe is easily cut or multiplied, depending on how many you want to serve and if you want to serve it as a main dish or a side dish.

All the fideo standard bearers in my family are gone now, so I often turn to this dish as an easy comfort-bearing memory food and continue to add my own little twists each time. In my grandmother’s time, most everything came out of a can. That is perhaps the key difference in my version. The basic ingredients are onions, tomatoes, green chile, and fideo — basically, vermicelli pasta somewhat similar to angel hair pasta. My preferred version of the pasta is coiled into little nests. The packets I buy are “La Moderna: Mexico’s #1 Pasta,” but if you don’t have a Mexican grocery accessible, it is fine to use straight vermicelli and break it into shorter pieces.

Luckily, I have gardeners in my tribe, so I am able to use tomatoes that my friend Bill grew and put up at the end of the last growing season, onions from the year-round growers' market, and green chile purchased in a fresh-roasted bushel in September and packaged in the freezer to get me through to the next growing season.

What sets fideo seco apart from other pasta dishes is that you first fry or toast the dry pasta, which gives it a bit of a nutty flavor.

Ingredients
(Serves 6 with leftovers)

Olive or Canola oil
1 large yellow onion sliced
2 packets of Fideo (La Moderna 6.3 oz each)
1 large yellow onion
Tomatoes Approximately 16 oz. (I do this to taste and it depends on whether you use fresh, canned or preserved garden tomatoes).
green chile (I chopped up 10 medium hot chiles . Heat is good but the flavor is most important to me).
vegetable or chicken stock
salt and pepper to taste
Garnishes as desired and available — avocado, cilantro, lime, cotija and/or queso fresco cheese, chipotle chile

Directions

Heat 1/3 cup oil in the pan (just enough to cover the bottom of your pan). Add slices of onion — cooking the onion beyond translucent until brown around the edges adds another layer of flavor. I put the onions in first to give them a head start toward browning and then push them to the side when adding the pasta.

Add the pasta and brown it on both sides. Once both the pasta and onion are browned, add a little of the juice from the tomatoes to stop the browning process. Add the tomatoes and chile. Some people prefer to purée the chile and tomato together, but I like them chunky. This would also be the time to add cooked shredded chicken, if you want to go in that direction. Add vegetable or chicken stock, as needed. The amount will be determined by how much juice you have from the tomatoes. You want the combined liquids to just cover the pasta. Let it all simmer together on the stove for about 10 min.

At this point, put the whole shebang in an oven-safe baking dish and bake it at 350 degrees until the liquid has been absorbed (approximately 15-20 min) and the pasta is tender. I prefer this method because I add cheese to the top for “melty” deliciousness and the dish is then transportable (remember the part about family/friend gatherings) and easily refrigerated for leftovers. Some folks prefer to just simmer it on the stove until the liquid is gone.

Making this dish always puts me in the company of my nana and the extended family gatherings at which this dish always appeared. If it was a birthday, a Mariachi band sometimes made an appearance. When sentimentality prevails, the cooking tunes shift with them. I cooked to a Nicaraguan duo, Guardabarranco (Katia and Salvador Cardenal). I knew them some years back, when the label I worked for distributed their album Si Buscabas (If You Were Looking). The title track is on my “most beautiful songs ever written” list.

Spaghetti Squash and Mint Lemon Pesto with Crab and Orange Roughy Meatballs

Put a fuzzy sweater on me. And those fingerless gloves. Crack the car windows so I can hear the snapping, swirling, and crackling of dried leaves when we're in motion. Put Alison Krauss's Now That I've Found You: A Collection on the stereo. Drive me through East Tennessee, then let me out of the car to breathe it, walk it, and absorb it through my epidermis and into my bloodstream. Don't call, email, or text me a thing because I don't want you to get your feelings hurt when I ignore you. I will ignore you. Sorry not sorry; I belong to Autumn.

Autumn has an intoxicating effect on me. Like a fickle lover. Yeah, you know the bloke — the one you know is going to break your heart over and over again, but whom you still welcome into your world with opened arms, hands raised, singing the chorus of "I Surrender All" with blasphemous vigor. 

There one moment and gone the next. Autumn — the fickle tickler — awakening all of my senses and making me breathe deeper than I ever did in Summer, Winter, and definitely Spring. (Claritin D, anyone? For the love …) Then it leaves without warning, with no long kiss goodbye. Yet, just like that leaving lover, it's our choice to either be bitter about the imminent end, or instead focus on living in the blissful moments and enjoying the gifts we are receiving.

Okay. That’s enough of a Meditation Challenge for today. Let’s get on with it.

Some people feel most creative in Spring, but for me, it's Autumn. I end up incorporating ingredients in new ways because I feel invincible at this time of year. You can't tell me nothin'. Plus, it's all about comfort food — am I right? Yet, if I'm honest, my take on comfort food has had to be modified due to the career I've chosen. If I don't want to give my wardrobe stylists conniptions, I often have to find reasonable alternatives to mashed potatoes, decadent pasta, and pumpkin soup bread bowls. This isn't easy to do, kids, but I must admit that I meet the challenge brilliantly. Taste buds can be just as happy as waist lines. I promise you.

My favorite moments to relish in Autumn are inspired by the season-specific produce lining every market bin. Tables are filled with different kinds of gourds and squash, all of which represent the various colors of every leaf on every tree at this time of year. It is also the time of the season to utilize certain things the earth gives us that it will soon take away. Many of our herbs need to be protected and preserved before Winter takes hold. Basil is currently holding on for dear life. Mint, too. Parsley makes claims that it can withstand Winter's wiles, but I have yet to see it happen successfully in my yard. Pesto is begging to be made. Begging, I tell you.

And so alas, in celebration of this, my most favorite season, I give you SPAGHETTI (spaghetti squash, that is) and MEATBALLS (orange roughy and crabmeat balls, that is) with a mint and lemon pesto that will make you want to make out with anyone you see in a sweater. I mean … just … trust me.

INGREDIENTS (Serving Size 6)
2 spaghetti squash, halved and seeds discarded
Safflower or grapeseed oil
Kosher salt
Coarsely ground black pepper
1/2 cup red or yellow onion, diced
1 small to medium shallot, minced
One large clove of garlic, minced
1/3 c of parsley, finely chopped
28 oz (2 c) wild caught crab claw meat, picked for shells (but there aren’t many in claw meat)
8-10 oz orange roughy
1 egg, beaten
2 c breadcrumbs (I used Glutino plain crackers, pulsed down to breadcrumbs)

FOR MINT LEMON PESTO
4 small to medium garlic cloves
2 c of mint
1/2 c fresh parsley
1/2 c Grana Padana or Parmeggiano Reggiano cheese
2 tbs fresh lemon juice
Zest of 1 lemon
1/2 c extra virgin olive oil
2 tsp kosher salt
1 tsp black pepper

DIRECTIONS
Preheat oven to 375.
Drizzle safflower or grapeseed oil lightly into squash and rub to coat.
Sprinkle salt and pepper inside to taste and place in baking dish, skin side down. Cover squash with foil.
Check at 30 minutes and, when you can pierce the skin with a knife and pull it out clean, it’s ready. Set aside.
Put 2 teaspoons safflower or grapeseed oil in a skillet. Add onions, shallots, garlic, and a healthy, two-finger pinch of salt. Sauté on medium high heat until soft. Try not to brown. Set aside.

Place orange roughy in food processor and blend until it's similar to coarse mashed potatoes. Place in large bowl and add crab meat, beaten egg, breadcrumbs, parsley, 1/2 a teaspoon of kosher salt, and a pinch of black pepper.
Bake for 20 mins.
Broil for 5 mins for added color.
Set aside.

Add to food processor garlic, mint, parsley, cheese, lemon juice, lemon zest, salt. Slowly drizzle in 1/2 cup of olive oil with food processor at first on pulse, then full blend.

Take a fork and twist out spaghetti squash in a circular motion starting from outside in until it looks like angel hair. Scoop into large bowl. Add pesto to spaghetti squash and toss to coat. Place meatballs on top and garnish with fresh mint and grated cheese and lemon zest.

Enjoy!

Tomato Basil Bisque and Grown-Up Grilled Cheese

One of my first jobs after high school was working as a chef … in a small café … in a church … a mega-church. You read all that correctly. I usually leave the last two parts out, when telling folks about that time.

I had been considering going to culinary school before this, but my father suggested I get more experience cooking professionally before embarking on such an expensive investment. That job came up, and I took it. It was up to me to determine the menu, make orders, try to configure costs versus sales, etc. The kitchen was really more like a storage room that had been furnished with a panini maker, mini oven, two small burners, and a commercial fridge and sink. As you can imagine, the limited resources made coming up with a menu challenging. My boss also determined that the menu would be changing each week. So, there I was, a recent high school graduate that had merely cooked at home for her parents and friends, trying to run a kitchen.

It turned out to be a really lovely season of growing, experimenting, and learning. I plumbed the depths of soups, salads, and sandwiches that I still love to make.

Today, I’m sharing a beloved combo I used to throw on the menu in the Fall and Winter: Tomato Basil Bisque and my version of a grilled cheese. It’s good. Really good. The kind of good that people would break their low-carb diets for. And even though it’s far from cold in Tennessee, sharing this meal with my husband today gave me all the warm and fuzzy Fall feelings.

I would suggest pairing this comfort food with my go-to comfort album: Josh Ritter's The Animal Years.

Tomato Basil Bisque (Serves 4-6)
3/4 cup celery, chopped
3⁄4 cup carrots, chopped
1⁄2 cup yellow onion, chopped
1 tablespoon fresh garlic, minced
1 tablespoon butter
3 cups tomato juice
1 cup broth
8 ounces of canned diced tomatoes
3 ounces tomato paste
1 teaspoon dried basil
1 teaspoon dried herbs de provence (optional salt & pepper)
1 cup heavy whipping cream … Sorry, no low-fat alternatives for this one.
3 teaspoons sugar (Trust me on this.)
1⁄4 cup fresh basil

In a large saucepan, cook celery, carrots, onion, and garlic in butter until vegetables are tender. Add tomato juice, broth, undrained tomatoes, tomato paste, dried basil, herbs de provence, and pepper. Bring to boiling; reduce heat. Simmer, uncovered, for about 30 minutes or until slightly thickened. Add fresh basil. Use immersion blender to blend the soup together. You can also place half of the soup in a blender or food processor, if you do not have a fancy immersion blender like I do. Cover; blend or process until smooth. Repeat with remaining mixture. Return all of the mixture to the saucepan. Stir in whipping cream and sugar; heat through. Taste and add more salt and pepper to your liking. Ladle into warm soup bowls. Garnish with fresh basil leaves, if you like to impress folks.

"Grown-Up” Grilled Cheese
4 ciabatta rolls
Salt and pepper
4 oz smoked gouda cheese
4 oz cheddar cheese
4 oz part skim mozzarella
Panini press, or something heavy, like a teakettle with the bottom wrapped in foil. I like to add some water to the kettle to make it heavier, because I’m creative like that.

French Onion Spread
1/2 red onion, chopped
1 TB olive oil
1/2 cup sour cream
1/8 cup mayo

Place chopped red onion and olive oil in a baking dish. Sprinkle with salt and pepper. Bake at 325 degrees for 30 minutes, mixing a few times mid-way through the cooking process. Meanwhile, half the ciabatta bread and grate the cheeses.

Once the onion is cooled, mix with sour and mayo. Add seasoning with salt and pepper to taste.

Spread French onion mixture on both sides of ciabatta rolls and layer with each cheese. Place in a greased pan on medium heat. Cook for a few minutes, then place kettle on top. Press down evenly. Cook for 3-5 minutes on each side, or until bread is crispy and cheese is melted.

Take off heat and slice grilled cheese in half diagonally. Serve alongside soup.

Peachy Pie

I've tossed. I've turned. I've sighed. I've gagged. But I'm gonna do it. I'm gonna give you my pie recipe.* I'm gonna suck up my selfish pride and share with you the very thing that gets me invited back into people's homes, time and time again. The thing that people talk about for years on end after having tasted it just once. The thing that two men (who shall remain nameless to protect their lives) have said out loud to me, "It's better than my grandmother's pie" while clenching their teeth and ducking in front of me for some reason — as if they expected the spirit of Gram Gram herself to come up out of the ground and smack them in the back of the head.

Hozier got one. Lee Ann Womack got two. Jack White got three (one of which John C. Reilly told me that he unapologetically devoured — Jack's birthday peach pie — in gluttonous revelry).

The list goes on. No, this isn't a failed attempt at a humble brag. It's a full on gauntlet thrown down. Consider this similar to one of those infomercials, where it sounds too good to be true, but then you spend the money to order the product and it gets shipped to you and you try it out and find yourself saying, "Well, I'll be a monkey's uncle! You CAN stick a peppermint wrapped in plastic into that hot skillet and it WILL NOT STICK." Money. Well. Spent.

So let's just get down to it because, if I write about this any more, I'm gonna renege. Big Time.

First things first — or, rather, one thing only: IT'S ALL ABOUT THE CRUST. The pastry, baby. The pastry. This is where you cannot cut corners. You need to go on ahead and buy the good stuff. I can't promise you that your pie will turn out like my pie if you don't want to fork out the cash for the organic all-purpose flour and organic *salted* butter (which is blasphemy to many, I know … trust me, I know). If you use vegetable oil, margarine, or whole wheat flour (what is even wrong with you?!) or any myriad of substitutions, don't write to me to ask why it didn't work for you. Also of note: This is not me saying that other pie recipes which utilize the aforementioned ingredients are crap. I have had many people's pies and many people's pie crusts and enjoyed them. Not everyone follows my code. I'm not here to say this is The Be-All End-All Mouth Explosion. I'm just telling you that it has been that, in my experience, to folks near and far.

Also of note: I studied under the tutelage of one Judy Brooker, a multiply awarded pie maker in Wisconsin, who happened to also give birth to my longtime musical brother, Sam. (She should get an award for that, too.) Although my recipe is different from hers, I wouldn't be who I am today without her. Thank you so much, Judy.

To steady my nerves (due to the big reveal), I'm listening to Joni Mitchell's song "The Circle Game" from her album Ladies of the Canyon. I'm actually listening to the whole album, but this song, in particular, is poignant to me at the moment, thinking about the seasons changing — not just in nature, but in my own life. You can't fight it; you just have to give in. It's better that way, really. And also because pies are, well, round … and round … and round.

Okay. Love you. Buh-bye.

*Full disclosure: I have a few pie recipes. I'm only giving you one of them. This is my basic, no-fail, peach pie recipe. As for the others, you'll just have to invite me over for dinner sometime.

INGREDIENTS
For the crust
2 cups organic all-purpose flour (plus extra for flouring your rolling pin and your surface)
2 sticks organic salted butter
1/4 cup organic cane sugar
1-2 cups of very cold, pulp-free orange juice
1 egg, beaten
1/4 cup brown turbinado sugar

For the filling
3 16 oz packages of frozen peaches
2 tsp lemon juice
2 cups organic cane sugar
3 Tbsp organic all-purpose flour
2 tsp ground cinnamon

DIRECTIONS
Preheat over to 350.

Place frozen peaches in a large bowl. Sprinkle lemon juice and all of the sugar on top and toss well to coat. Leave in the fridge over night or for at least three hours in the fridge to expel unnecessary juices.

With a large, wide knife, cut all butter into 1/2 inch cubes. Transfer to a small, chilled bowl.

In a 7-11-cup food processor or large mixing bowl, add flour and sugar. Using the pulse setting on your processor or a manual pastry cutter, add butter into flour in fingerfuls, pulsing or cutting in the butter until incorporated. If using the processor, that will be about 6-8 pulses. If using the pastry cutter, work it in until there are no large cubes noticeable. Repeat this step gradually until all of the butter is incorporated. The mixture will be a pale yellow, when it's ready. It doesn't have to be pea-sized crumbles. It just needs to be crumbly and pale yellow with no white flour streaks showing. If you still have white flour exposed, process the mixture more until the color is that even, pale yellow … but NEVER knead your dough. Ever.

Pour ice cold orange juice in tablespoons into the mixture and pulse or process until evenly distributed. Keep adding o.j. in tablespoons until it starts to look and feel like pie dough, pulling away from the sides of the bowl. Pinch a small piece of it with your fingers. If it holds together without crumbling at all, then it's ready to roll out. Don't worry if you get the dough a little too wet by accident. You'll just need to coat it with more flour before you roll it out.

Dust a clean, dry surface with a quarter cup of flour. Spread evenly in a loose, round pattern with a circumference wider than your dough will be rolled out to. With a gentle yet firm motion and either a spatula or an open palm, collect the dough into a large ball. Place the ball in the center of the flour on the surface. Sprinkle extra flour onto the dough ball if it's sticking to the surface or onto your hands. Cut the dough ball in half and wrap each ball in plastic wrap and put in fridge … if you want. I, personally, only do this task sometimes. Mostly, I take my rolling pin to it immediately and lay it into my pie dish, add my fruit and top crust and bake it straight away and it's amazing. However, if I've accidentally added too much liquid to it, I will do the refrigeration step because it firms it up enough for me to roll it out.

Watch a tutorial on how to properly use a rolling pin on dough and roll out your dough into two rounds about 10 inches wide. If you don't know how to do it, it's unfortunately something you just have to see and then experience to learn how to do it. You can also hire me for 50 bucks to come over and train you. It's rather exhilarating once you learn how.

Lay your bottom crust into a 10-inch pie dish. If you only have a 9-inch dish, that's totally fine, too. You will have excess dough on all sides. Take a butter knife and cut around the edges against the side of your dish, leaving 1 inch of dough hanging over the sides. Drain out the majority of liquid from the now-thawed and sugared peaches. Don't worry: It will naturally make more. Add 3 tablespoons of flour and toss to coat. Add cinnamon and toss to coat. Drain one final time, if need be. Pour peaches into pie dish.
Place top crust onto peaches and seal both edges of the dough by crimping and pinching the dough together, little by little.

Take a paring knife and create some air pockets towards the center of your top crust. Get creative. It'll taste good no matter what it looks like, so might as well have fun with it.

Brush your beaten egg onto every bit of exposed crust that you can see. Sprinkle brown turbinado sugar liberally and evenly onto your entire crust.

Place a baking sheet wide enough to catch any potential spillage onto the oven rack just beneath the rack that the pie is going to go on. Place your pie on the center rack of the oven.

Bake until it smells and looks good.**

**Sorry. Some things just have to be instinctual. If you are watchful and trusting of your gut, you will not fail in this. I believe in you. I will strongly advise you to purchase pie edge covers, though, to cover your crust's edges in the oven once they start to brown slightly so that they don't burn.


To follow Ruby Amanfu's culinary adventures, check out Recipes by Ruby. Prefer strawberry to peach? Give Natalie Schlabs' pie recipe a whirl.

My Mother’s Strawberry Glacé Pie

Summer is my least favorite season. This may stem from growing up near Amarillo, Texas, where the months from June to August perpetually feel like a hair dryer — windy and dry. As a kid, water needed to be involved to tempt me outside. As an adult, I am learning to like it more. Moving to Tennessee has helped, but heat is still heat. I hate being hot, and I hate how my hair grows three times its size in frizz.

But there is one thing thing about Summer I have loved ever since I can remember, and that is the produce. I grew up a few miles outside of the city on my grandparent’s land. Their house was just down the road from ours with fields of either corn or wheat in between. Each year, my grandparents would bring over whatever they grew in their garden: typically squash, zucchini, tomatoes, and corn (which we shucked ourselves). Summer brought our family a bounty of beauty to eat.

It still does. There are just so many options! Peaches, blueberries, strawberries, and watermelon. Tomatoes taste good on their own or with a pinch of salt and sliced basil. I tend to eat simpler because the food shines all on its own.

This strawberry pie is one my mom used to make when strawberries were at their peak. It is as lovely to look at as it is tasty to eat. A slice of this with a huge spoonful of whipped cream is bound to distract you from the heat.

And, of course, Patty Griffin’s 1000 Kisses is the perfect accompaniment to baking and eating this delicious dessert.

Pie Filling Ingredients
9-10-inch baked pastry shell (See below for recipe.)
5 pints strawberries, washed and trimmed
2 cups sugar
6 tablespoons cornstarch
1 cup water
2 tablespoon lemon juice

Directions
Crush enough strawberries to make 2 cups. In saucepan, combine sugar, cornstarch, crushed strawberries, and water. Cook over medium heat until mixture boils and thickens, stirring constantly. Blend in lemon juice. Cool. Add the remaining whole or sliced strawberries to glacé mixture, tossing gently. Arrange in cooled pie shell. You may have some leftover filling. Chill for an hour or when it appears the pie is set. Serve with fresh whipped cream.

Pie Shell Ingredients (Courtesy of my best girl Miranda. She’s a baking queen!)
2 2/3 cups all-purpose flour
1 teaspoon salt
1/2 cup shortening
1/2 cup cold butter, cut into pieces
7 to 8 tablespoons cold water or vodka. (That’s right, vodka. It makes it especially flaky. Sometimes I do half water/half vodka.)

Directions
Mix flour and salt in medium bowl. Cut in shortening and butter, using pastry blender (or pulling 2 table knives through ingredients in opposite directions), until particles are size of small peas. Sprinkle with cold water (or vodka), 1 tablespoon at a time, tossing with fork until all flour is moistened and pastry almost leaves side of bowl (1 to 2 teaspoons more water can be added if necessary). Gather pastry into a ball. Divide in half and shape into 2 flattened rounds on lightly floured surface. Wrap flattened rounds of pastry in plastic wrap and refrigerate about 45 minutes or until dough is firm and cold, yet pliable. If refrigerated longer, let pastry soften slightly before rolling. Roll one round (save the other round for later!) on lightly floured surface, using floured rolling pin, into circle 2 inches larger than upside-down 9- or 10-inch glass pie plate. Fold pastry into fourths; place in pie plate. Unfold and ease into greased plate, pressing firmly against bottom and side.

Bake at 450 degrees for 10-15 minutes, depending on your oven. It’s ready when golden brown. Cool on rack.


For another great dessert, try our Chocolate Pudding Cake with Caramel Sauce recipe.


When singer/songwriter Natalie Schlabs isn't in the studio or on the stage, she's quite often in the kitchen. Look for a new record coming soon.

Mango-Butterscotch Pudding

I recently had the honor of hosting a notable birthday dinner for one of my besties, Kristin Russell. It was notable for a number of reasons — a celebration of life, resilience, and all things new. Kristin has been one of my go-to touchstones for the past few years in this wildly complex journey of life to date. The least I could do to show my gratitude for her constant feeding of my soul was to feed her beautiful belly, as well as the beautiful bellies of some of her lovely friends.

The menu was all things Comforting (capital C, if you know what I mean). Chicken liver mousse with strawberry and pomegranate gelée and all the accoutrement, sun dried tomato and chickpea dip, cornish game hens with pear bourbon sauce, zucchini gratin, creamy parmesan and garlic polenta made with local Riverplains Farms corn meal, and the pièce de résistance which I would like to share with you now — mango butterscotch pudding.

This sweet, salty, creamy, and cloud-like dessert was a complete brainstorm.

Translation: I had no idea what I was doing.

I'm not a major dessert eater. Never have been. When I do partake, I rarely take more than a couple of bites of the thing — even if I spent hours creating it. I generally fret about making desserts overall, unless we're talking about pies. To me, though, pie making is all about the dough and the crust, so I'm just saying that I'd much rather wrap my all-butter-crust around some chicken or corned beef instead of, say, apples … if it's all the same to you.

So back to fretting; I had stayed up the night before until almost 4 am reading through dessert recipes. I had gone foraging in the fridge already to see what I had that I might be able to utilize. I found two beautifully ripened mangos — so that was happening. I also knew that a friend of Kristin's (and now a friend of mine), Jennifer Niceley, would be bringing a harvest of farm fresh chicken's eggs from her family's East Tennessee farm, Riverplains, so I was Googling "dessert recipes with a LOT of eggs." Would it be a mousse? Hmm … Meringues? Weeeelll? Then, I read through a pudding recipe and got that spark in the dark! Seven other pudding recipes and a few videos later, I had my marching orders for the next day.

I woke up at 8 am the next morning with pudding on the brain. I efficiently completed the remainder of prep work for the meal I had to do, put some Nina Simone on the speakers, then sat on a kitchen stool like a kid on Christmas morning waiting for Miss Niceley and the Eggs to arrive. "Miss Niceley and the Eggs" … I need to hurry up and write that children's book.

When Jennifer arrived, it was like handing your baby to grandma. I confidently handed my iPad to Jennifer with some additional gibberish-filled mad science instructions about my hopes for this dessert. Let it be said that only another fellow avid cook could interpret what I told Jennifer that day. I also have to note that I don't know what I would've done without Jennifer's warm presence and helping hands that afternoon, in general … We shouted to each other over the Vitamix the whats and hows of pudding prep and muscled through the steps together. The biggest challenge for me in the process was eliminating the sensation that you were eating fur while eating the mangoes. I solved that by straining the mango pulp (after blending it) two or three times through a sieve until I could guarantee that not an ounce of the puréed mangoes' texture resembled cat fur.

In the end, it looked and tasted like all birthday pudding should taste — immaculate. Indeed.

Hope you think so, too.

Mango-Butterscotch Pudding

SERVINGS: 8

INGREDIENTS
1/4 cup (1/2 stick) unsalted butter*
3/4 cup (packed) light brown sugar
1/2 teaspoon kosher salt (*leave this out if using salted butter)
3 1/2 cups whole milk
6 large egg yolks (or 7 small)
1 tablespoon vanilla extract
2 ripe mangoes — peeled, chopped, puréed, and STRAINED (They're hairy little buggers, so you will need to use a sieve to remove the "hair.")
1 small packet or sheet gelatin
1/4 cup cornstarch, sifted
3 tablespoon sugar

Optional: fresh mint, pomegranate seeds, berries, whipped cream, and/or crumbled ginger cookies for garnish

DIRECTIONS
Melt butter in a medium saucepan over medium heat until just golden brown; do not let it get dark or, sorry to tell ya, you'll need to start over.
Add brown sugar and cook while stirring, until sugar is just starting to dissolve.
Add milk and salt; bring to a simmer. Remove from heat.
Whisk egg yolks, sifted cornstarch, and sugar in a large bowl until smooth.
Add puréed and strained mango to egg mixture. Stir until smooth.
Add gelatin to hot milk mixture, whisking with speed constantly to avoid getting lumps.
Pour hot milk mixture from saucepan into egg & mango mixture, slowly and in rounds, whisking per every small pour.
Wipe out saucepan. Strain custard through a fine-mesh sieve back into saucepan and cook over medium heat, whisking very often, until it bubbles occasionally and starts to thicken (about 5–6 minutes).

Optional: If you do have any lumps in your mixture for some reason, transfer the mixture to a blender and blend briefly on low speed until smooth.

Place 8 ramekins or bowls on a rimmed baking sheet. Divide pudding evenly among ramekins and chill until set, at least 3 hours.

Optional: Top each pudding with whipped cream and any of the suggested garnishes, if desired.

Salmon Cakes with Mirepoix

When I was 18 years old, I moved to Alaska and found myself in the middle of wonderful adventures in music, hunting, and fishing. My good friends Ginger Boatwright and Doug Dillard were about to play some shows the Summer I arrived. They invited me to join them and fill the fiddle slot. Good times were had!

I met plenty of friendly folks traveling around the state. Many became life-long friends. Some of the folks I met that first Summer and my family that lived there would often invite me along on their annual freezer-filling hunting and fishing expeditions. I even brought my dad along when he would come to visit from California. There was so much about Alaska’s bounty. Of course, respecting Mother Nature and taking only what you needed was paramount. And the idea of not having to go to the supermarket for meat was an incredible idea. It is a foreign idea to some, but it didn’t take me long to get used to making it happen all the time in the North Country.

I found a different way of life than what I grew up with in California. I had done some hunting and plenty of fishing, but not like what I was doing in the last frontier. It was more about subsistence, and the quality of Alaska’s protein is remarkable — the most organic, free range, healthy, and flavorful critters you can imagine, including deer, moose, caribou, salmon, halibut, cod, king crab, tanner crab, Dungeness crab, scallops … the list goes on and on. Harvesting the animals and packaging them for safe storage in the freezer or jarring/canning them for the shelf takes energy, but the rewards are immeasurable.

Alaskan summers were always filled with a plethora of flavorful, rich salmon. I have an affinity for it. Glazed, marinated, grilled, smoked, beer battered, poached, and even raw. Having so much around meant finding new ways to prepare it, as to not get tired of the same old, same old. So, I experimented and started making salmon cakes using ingredients I always have on hand like onions, carrots, and celery. These aromatics are often referred to as mirepoix. (Pronounced, MEER- pwah.) I often add garlic to it and use the combo for soup and sauce bases, too. In addition, caramelizing it in butter will get a sweeter, more complex taste. It’s a great starter for many dishes.

Here is the guide to one of my favorite uses of mirepoix and canned or jarred salmon. When I made this last, I was listening to Black Prairie’s A Tear in the Eye Is a Wound In the Heart. Enjoy!

INGREDIENTS

1 pint jar of wild Alaska or Pacific NW Sockeye/Red or Chinook/King salmon, broken up
1/2 medium sweet onion, minced
1 medium sized celery stick, minced
1 small carrot, minced
4 cloves of garlic, minced
1/2 of a sleeve Ritz crackers, crushed into fine bits
2 eggs
1 tablespoon olive oil
1 tablespoon butter
salt and pepper

DIRECTIONS

In a nonstick skillet on medium-high heat, caramelize onion, celery, carrot, and garlic in butter. Salt and pepper to taste. Let aromatics cool and then, in a bowl, mix with salmon, eggs, and crushed Ritz crackers. Form into 3-inch diameter by 1/2-inch thick patties. Heat olive oil in a skillet on medium-high heat. Place patties in hot skillet. Cook a couple at a time as to not crowd them in the pan. DO NOT MOVE THEM AROUND until they are browned on one side. Once brown, gently turn them over and let cook until brown on the other side. Should make about 4-5 patties.

Serve with steamed rice or potatoes, or green leafy vegetables, or on a sandwich.